Overview of Products
Products
Learn how to manage products efficiently in the SAS Inventory module — add, edit, or remove product data with ease using the Products tab.
SAS Inventory module is a great place to store and configure data pertaining to mange products. You can add new items and their variations to the module using the items tab. If necessary, you can also change or remove these records. Choose ‘Products’ from the Products tab’s dropdown list.
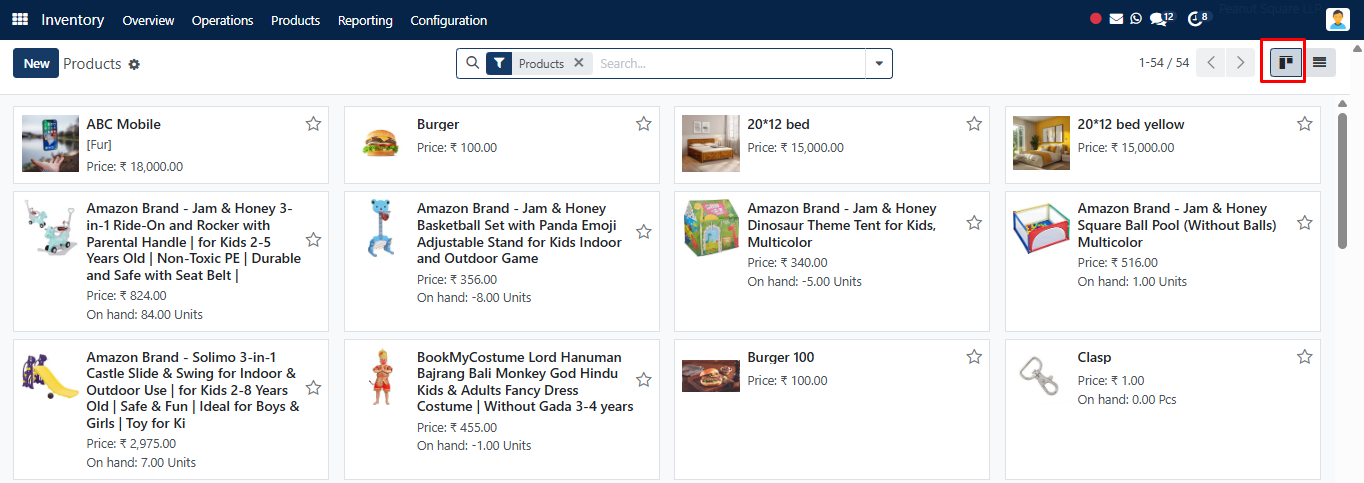
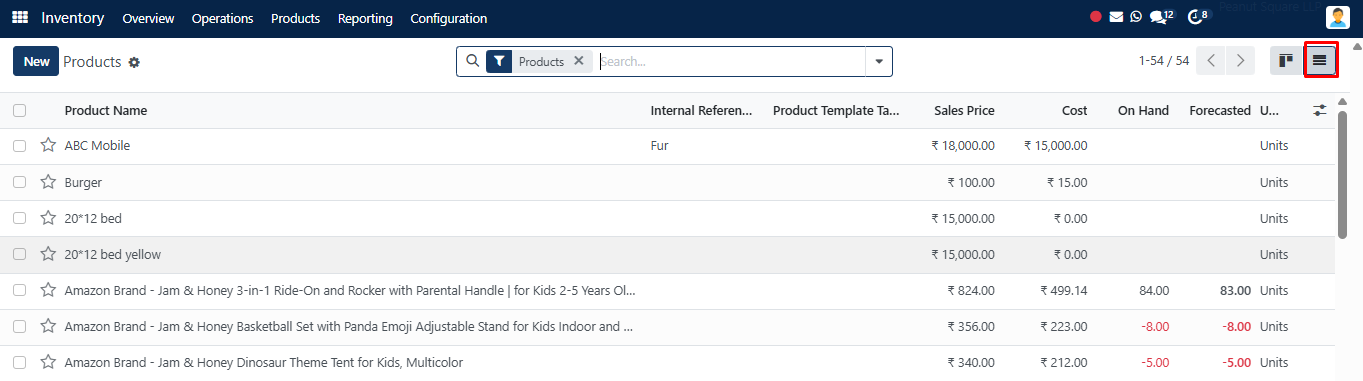
By default, all of the products set in the module will be displayed in the Kanban view in the Products window. Using the List view icon located in the upper right corner of the window, you can change the display to a list view.
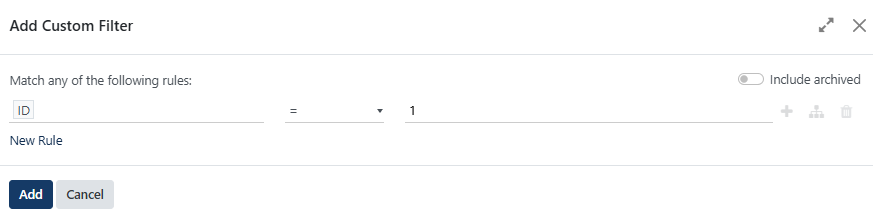
With the Filters and Group By options in this module, you can use certain product records to separate and analyze them. The options like Services, Products, Published, Available in POS, Can be Sold, Can be Purchased, Can be Subcontracted, Can be Expensed, Available Products, Negative Forecasted Quantity, Favourites, Warnings, Archived, and Add Custom Filter allow you to apply the desired filter from the dropdown list of “Filters.” Choose the necessary parameters from the two dropdown boxes and put the condition in the third box if you wish to apply custom filters. Lastly, select Add.
The ‘Group By’ feature allows you to organize the records into predefined groups. From Product Type, Product Category, POS Product Category, and Add Custom Group, choose the relevant group. Select the appropriate group from the drop-down menu and click “Apply” to add a custom group. You can save your preferred filters in the Favorites section to save having to apply them again. Choose from options like “Save current search,” “Import Records,” and “Add to my dashboard” in this section’s dropdown list.
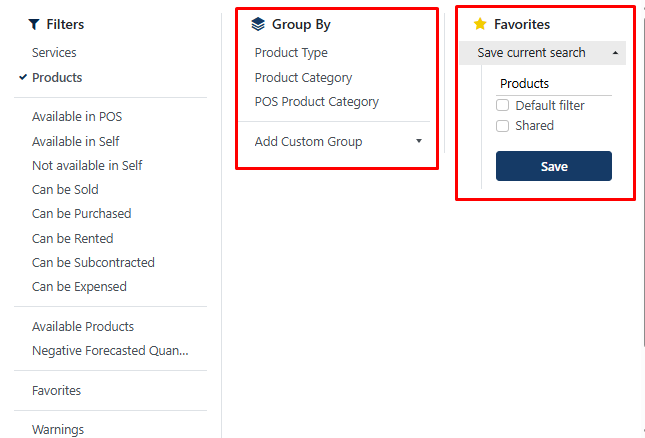
There is a subsection under “Save current search” where you can give your applied filters a name. The Products window will only display those products by default if you click the “Use by default” box. You can distribute this filter to other users by selecting “Share with all users.” In order to apply these changes, click “Save.”
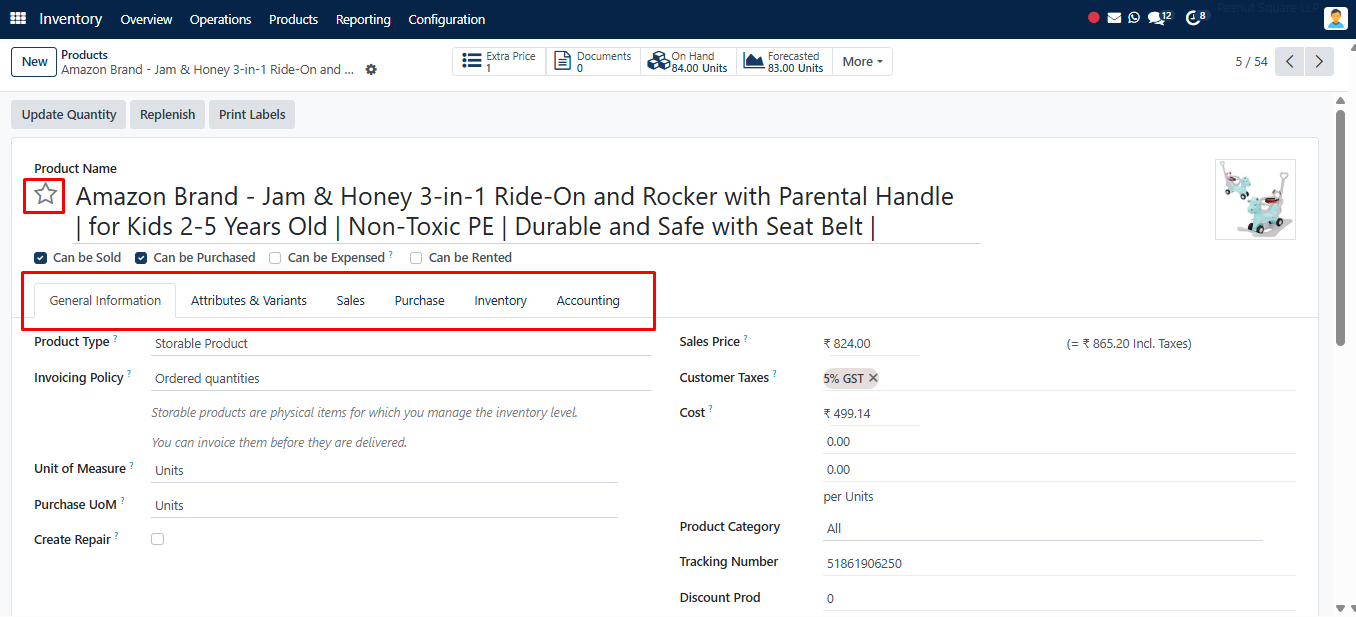
Each product’s name, image, and price will be displayed in the preview. To view a certain product’s comprehensive overview, click on its preview. You can modify a particular record in SAS directly from its form view, eliminating the need for an additional modify button. This functionality is a welcome addition to the latest iteration.
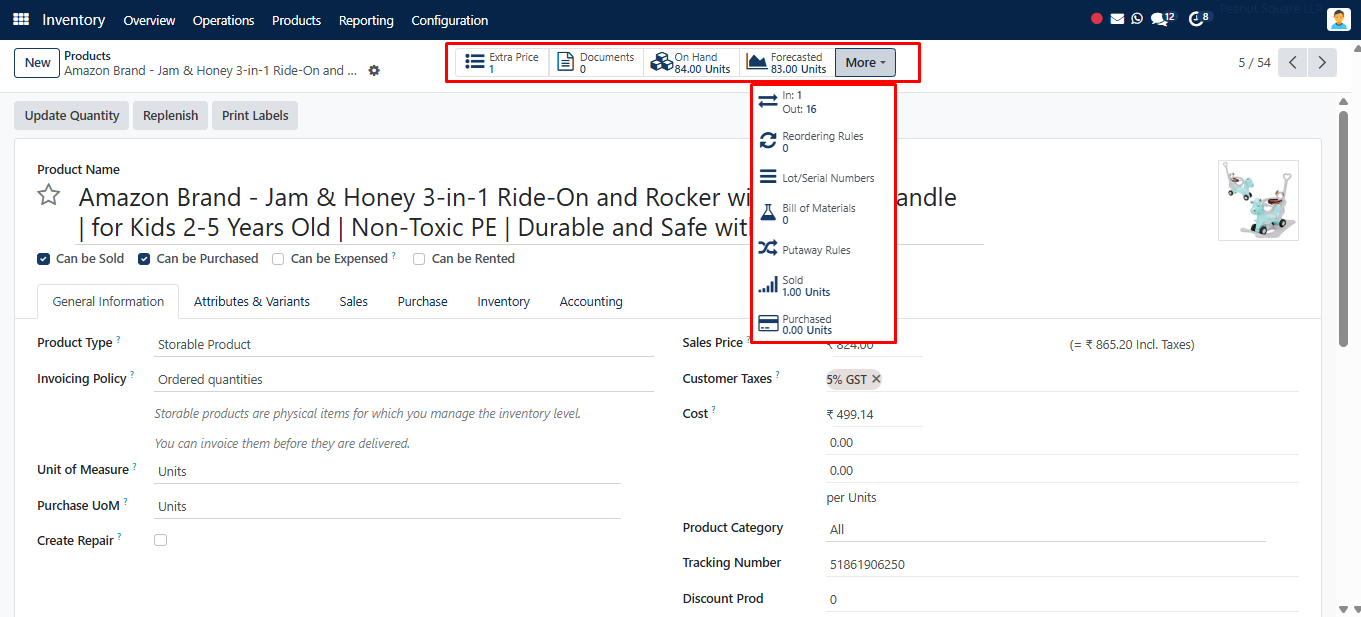
The Extra Prices, Number of Units On Hand, Number of Units Forecasted, In and Out (Product Moves), Reordering Rules, Lot/Serial Numbers, Bill of Materials, Purchase Analysis, Sales Analysis, and Digital Analysis sections can all be monitored and managed through this window.
Furthermore, you’ll see that the New button is now located in the form view on the right. One of SAS latest improvements is this feature. You can select “Actions” to carry out more actions.
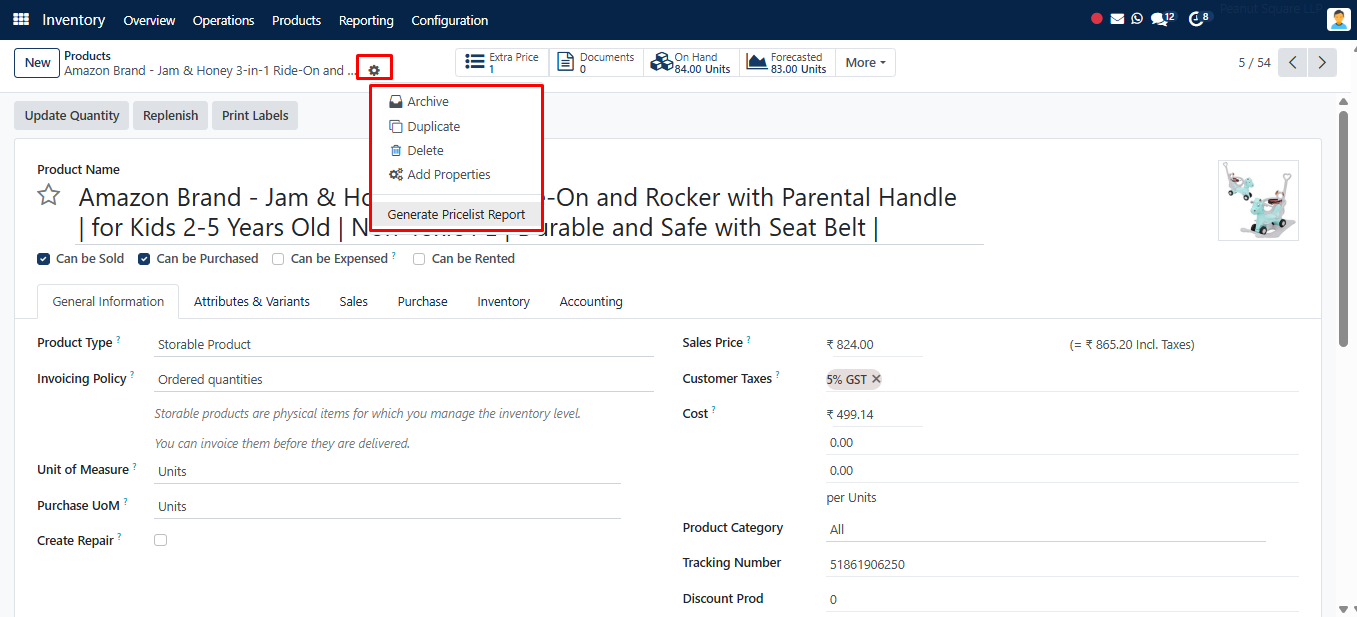
Depending on the selections, create a pricelist report, duplicate, delete, and archive.
Step-by-Step: Create a New Product
Select New to incorporate and set up a fresh product into the framework. A window containing sections for general information, attributes and variations, sales, purchase, and inventory will appear for you to add the product’s characteristics. Clicking the star icon next to the product’s name will allow you to add it to your favorites.
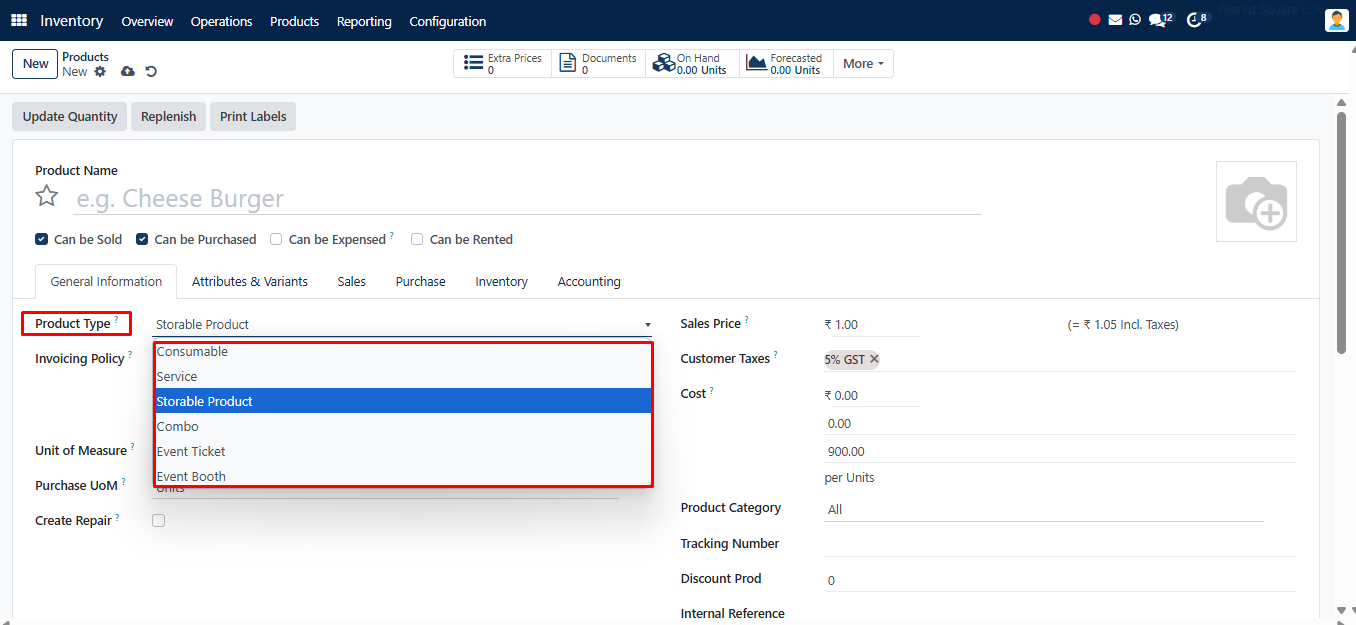
By clicking on the image icon, you may upload an image and enter the name of your product in the Product Name area. Additionally, you can select the boxes from the options that correspond to your goods, such as Can Be Sold, Can Be Purchased, Can Be Expensed and Can Be Rented. Selecting the Product Type is possible via the General Information tab. Options such as Consumable, Service, Storable Product, Combo, Event Ticket, and Event Booth will be displayed in a dropdown list.
Below is an explanation of each of these sections.
● Consumable Product: A Consumable product is one that is tangible and may be provided or received. The stock of this product is not controlled.
● Service Product: The category of non-tangible goods that your business offers.
● Storable Product: You have control over these products’ inventory.
● Combo: A Combo is a bundled product made up of multiple items or services sold together, like a meal combo or product with installation. Each item in the combo is tracked individually in inventory.
● Event Ticket: These are goods that include event tickets.
● Event Booth: These stalls can be sold by listing them as items.
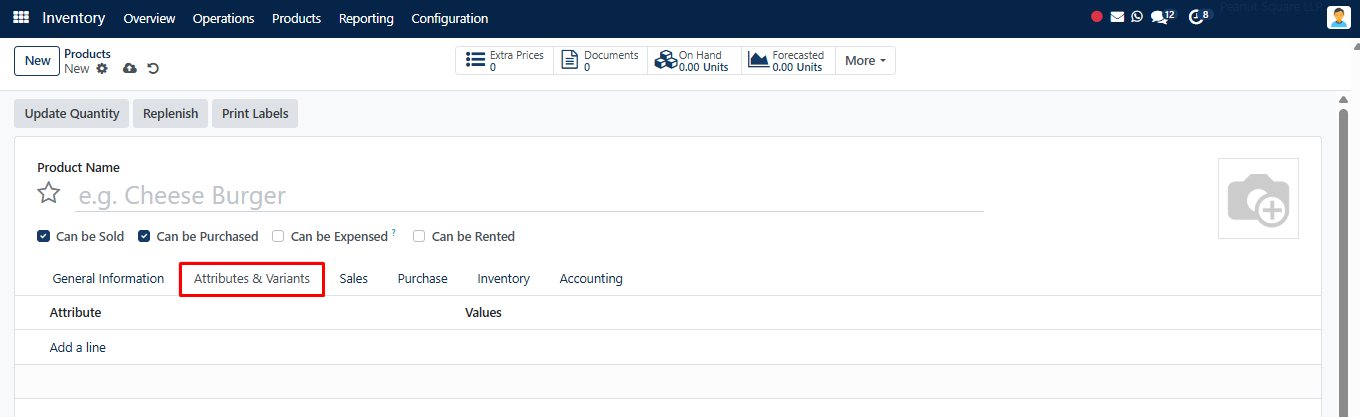
You can set up the product’s variants to the record using the Attributes & Variants tab. To input the versions and the appropriate attributes, click “Add a Line.”
Under the Sales tab, you can configure the product’s sales-related details.
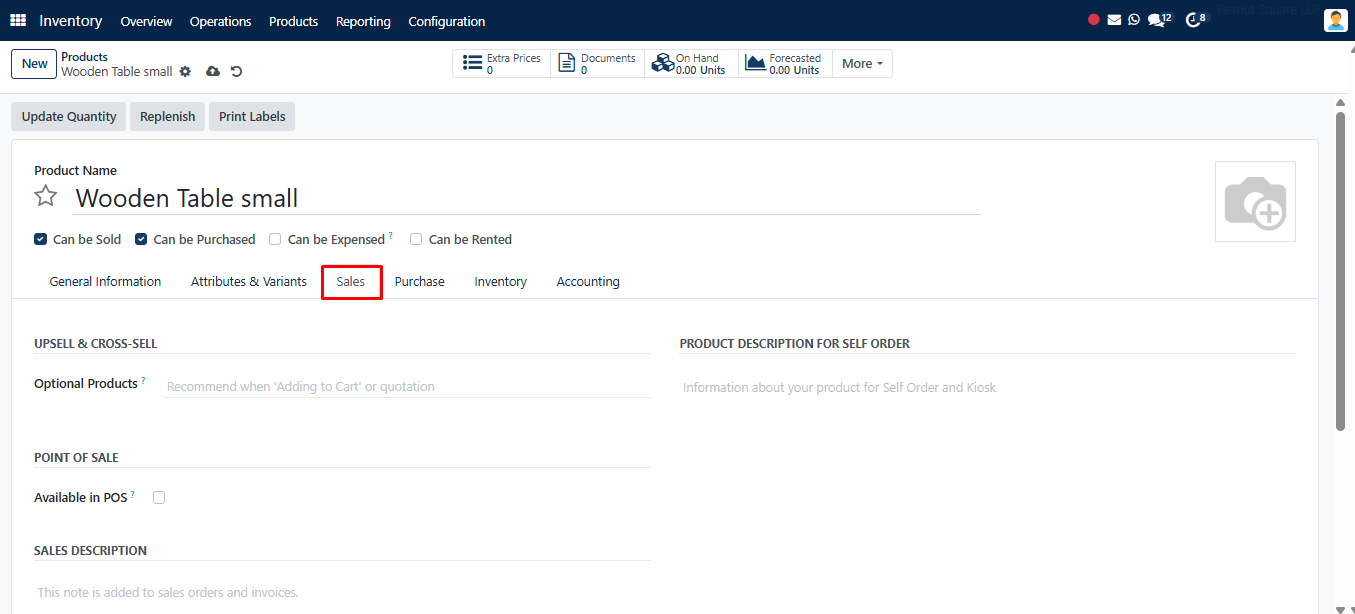
You can list any more products you wish to sell in addition to the original product in the Optional Products area. To make the product available in your POS session, turn on the Available in POS option.
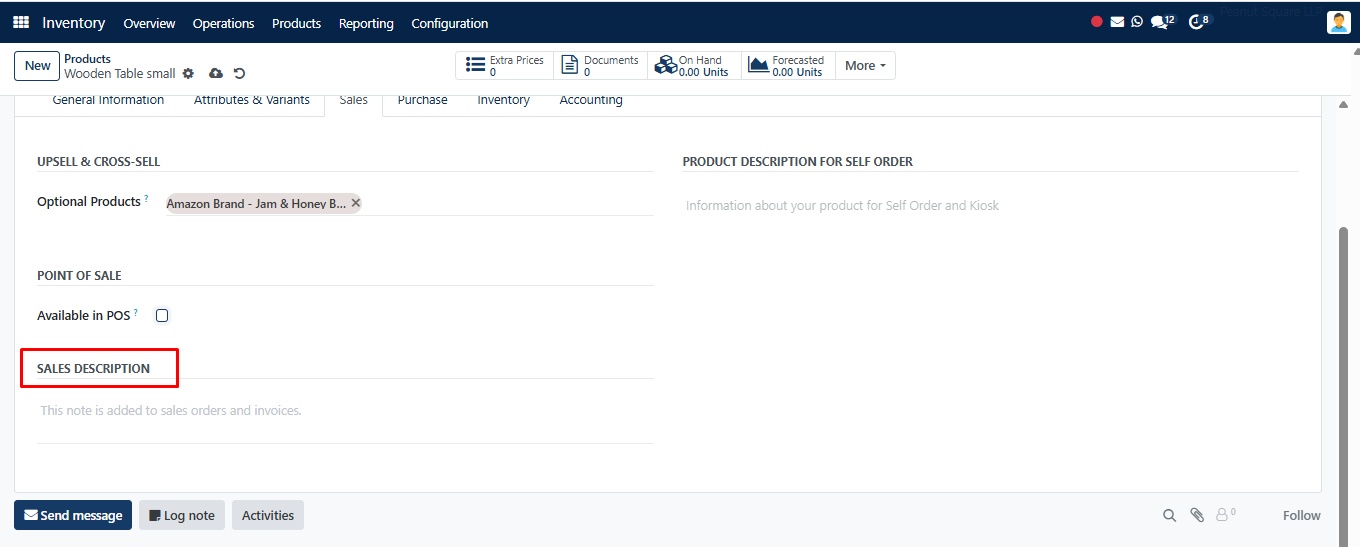
You can provide a sales remark in the Sales Description box, and it will show up on the product’s invoice and sales order.
You can use the Purchase tab to add information about purchases. Using the Add a Line button, each vendor’s name can be inserted individually.
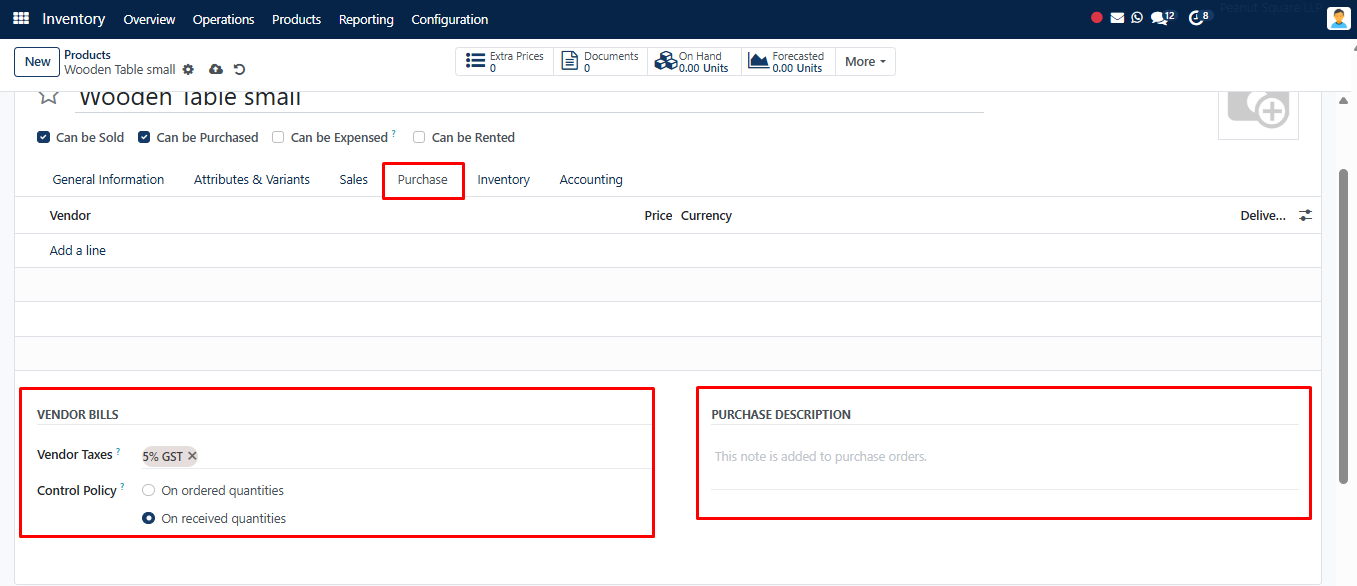
You can add more than one vendor for a product here and evaluate their costs. In the Vendor Taxes column, you can specify the default tax that was applied when you bought this product. It is possible to set the Control Policy for vendor bills based on either received or ordered quantities. You can include notes in the Purchase Description section, and those notes will show up on the purchase orders for this product.
You can specify a product’s Routes of Operation from the provided option on the Inventory tab. It is possible to configure the route as Buy, Manufacture, Dropship Subcontractor on Order, Resupply Subcontractor on Order, and Dropship.
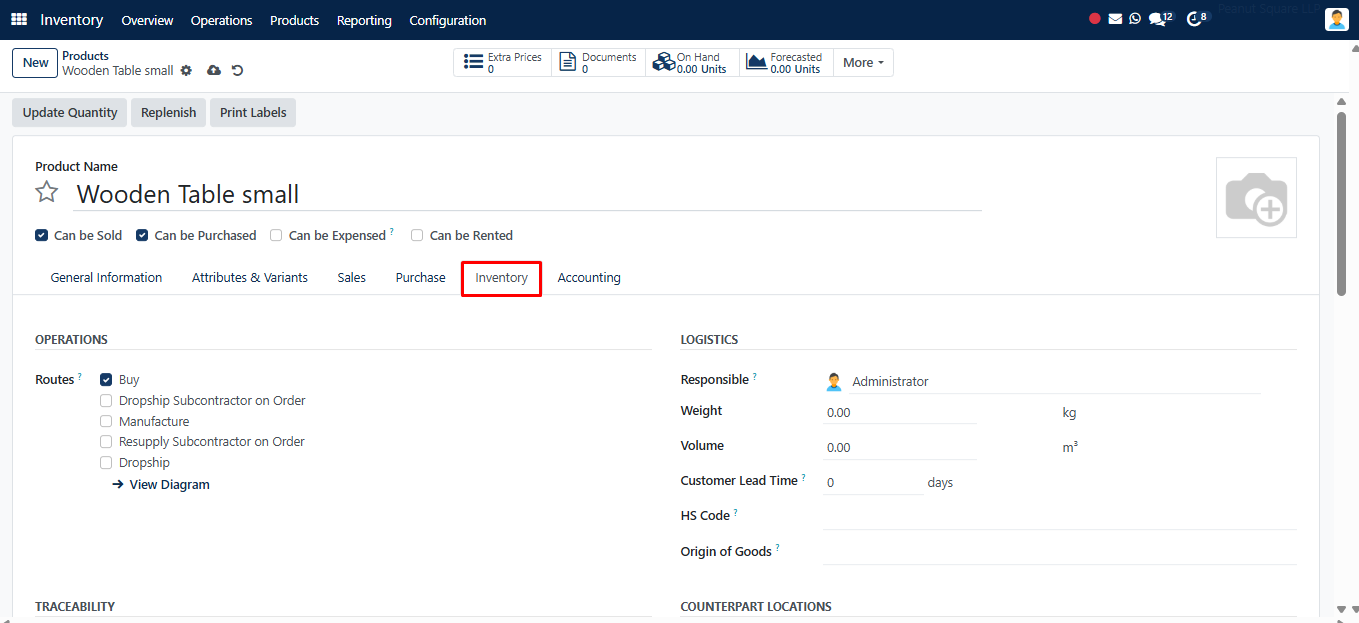
In the Responsible area, you can designate an individual to oversee the product’s Logistics operations. You can enter Weight, Volume, Customer Lead Time, HS Code, and Origin of Goods in the corresponding fields. The Customer Lead Time is the average number of days from the sales order confirmation date to the delivery date.
You can indicate how to trace the products in your warehouses in the Traceability box. Products can be tracked by lots or by a distinct serial number. By choosing the No Tracking option, tracking can also be turned off.
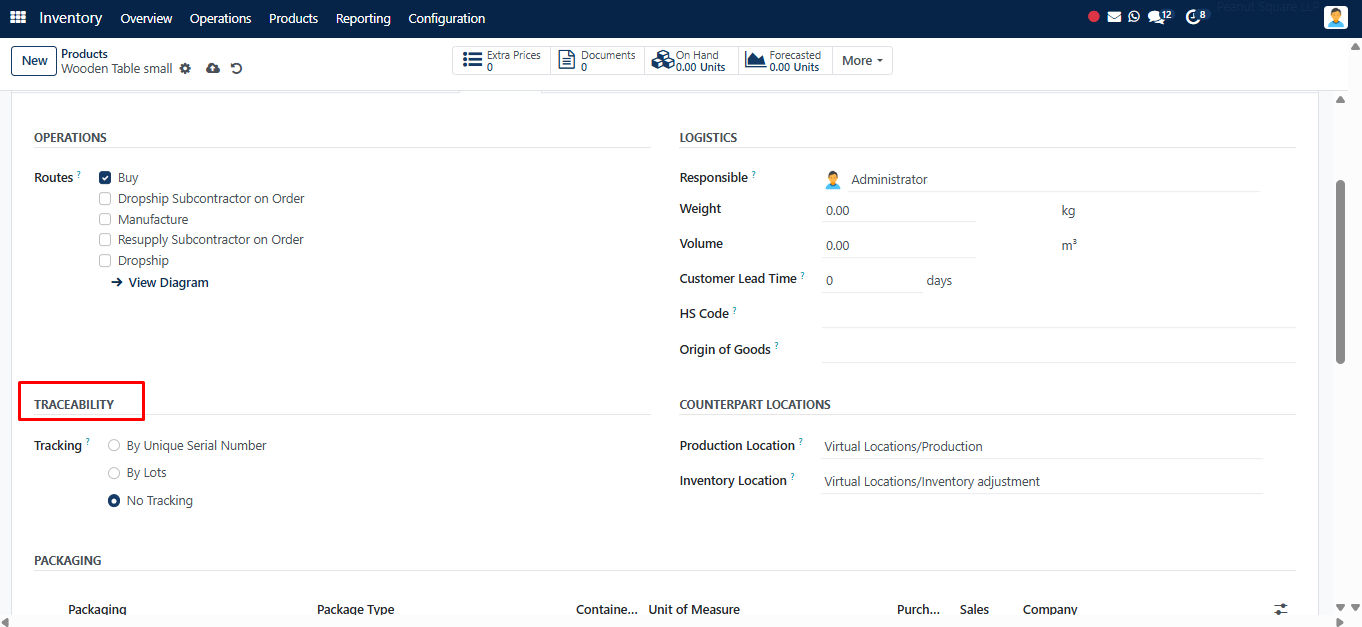
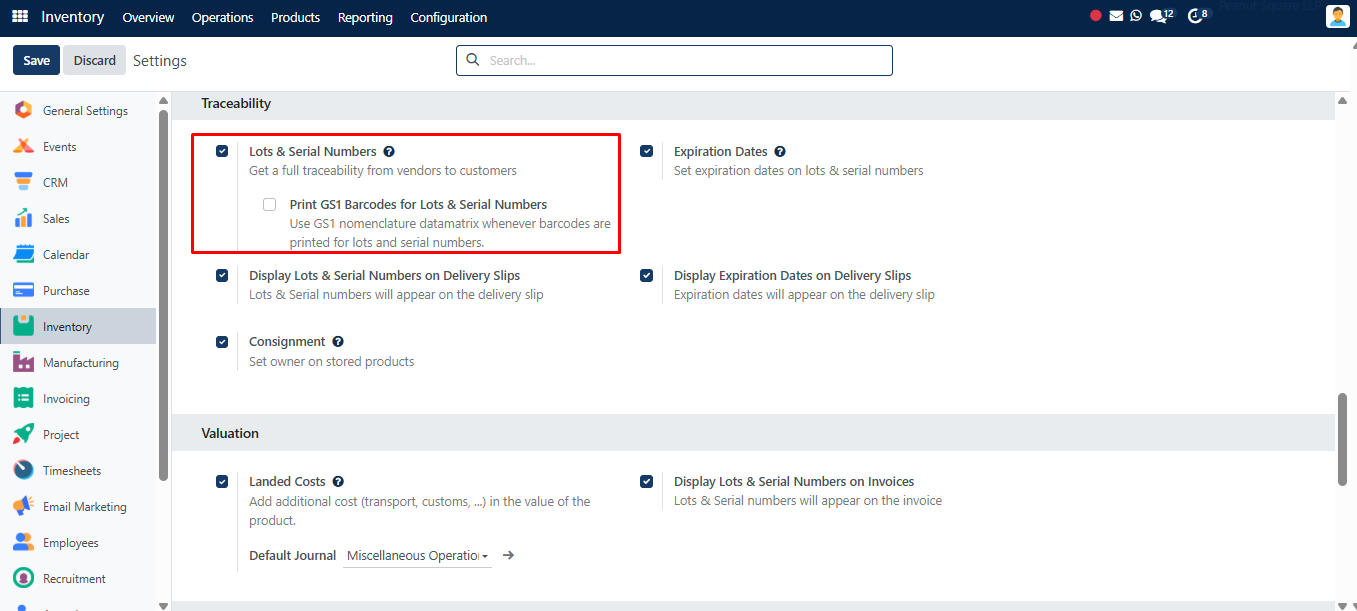
The Traceability section is only available after enabling the Lots & Serial Numbers option from the Settings.
The Product Packaging’s option, which can be used to define the type of packaging for products, can be activated from the Settings menu of the module.
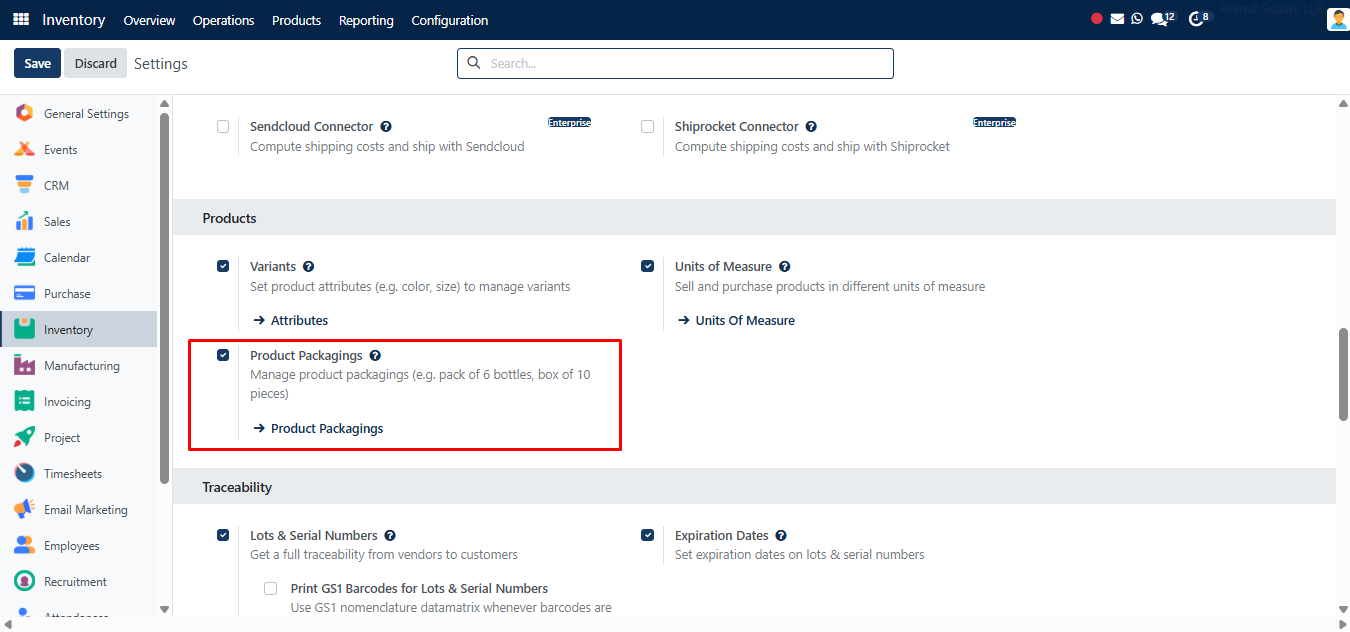
After you enable this option, the product form view’s Inventory tab will display a designated section where you can set the product’s packing type.
Here, you may use the Add a Line option to add the product’s packaging. You can choose the appropriate Package Type from the available options. In the designated space, state how much of the product is contained in the packaging. You can enable the relevant fields if you wish to use these packages in the sales and purchase orders.
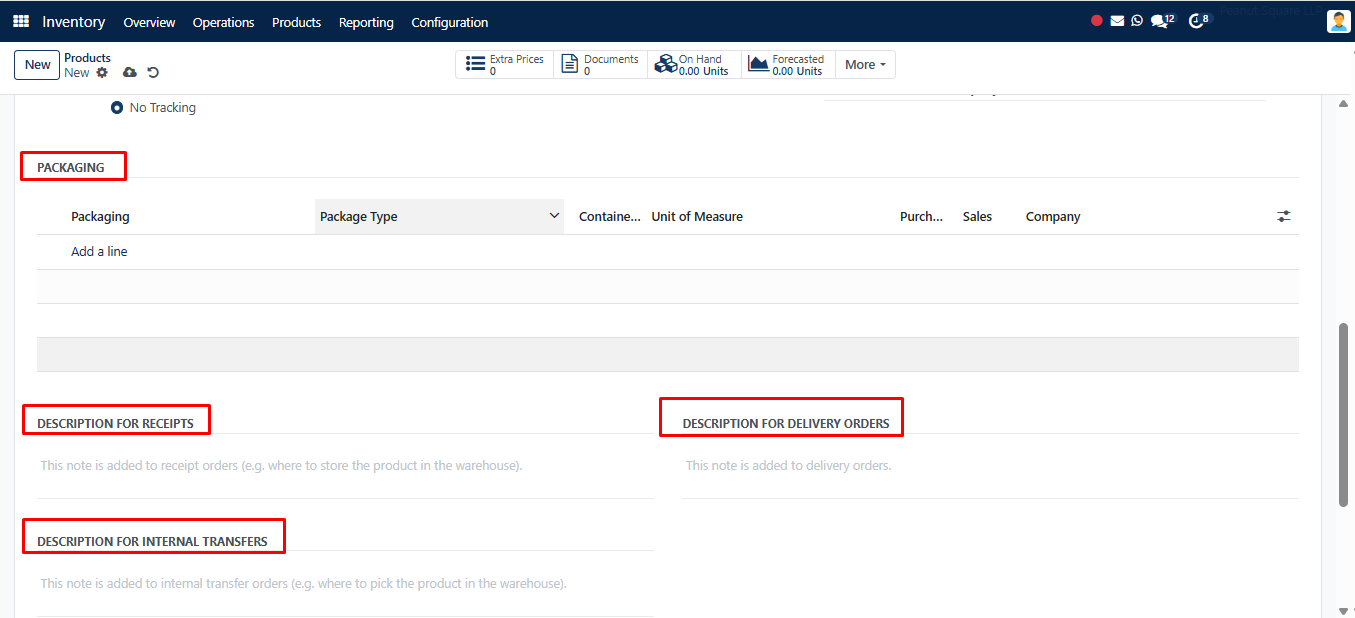
Furthermore, specific fields will be provided for you to write descriptions for internal transfers, delivery orders, and receipts. In the relevant sessions, include any necessary information.
You can discuss the product’s accounting information using the Accounting tab. To track the inflow and outflow of cash, you can enter an Income Account and an Expense Account in the Receivable and Payable area.
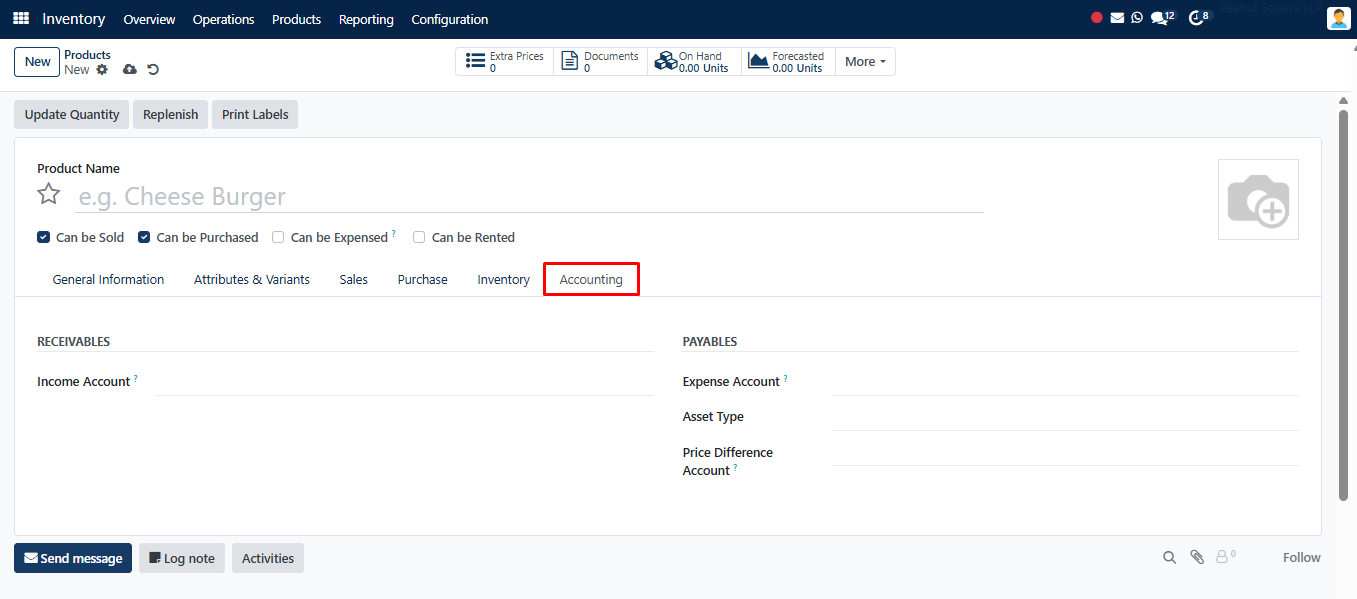
When confirming a vendor bill, the price difference between the vendor bill and the purchase price is recorded in the Price Difference Account for automatic inventory valuation.
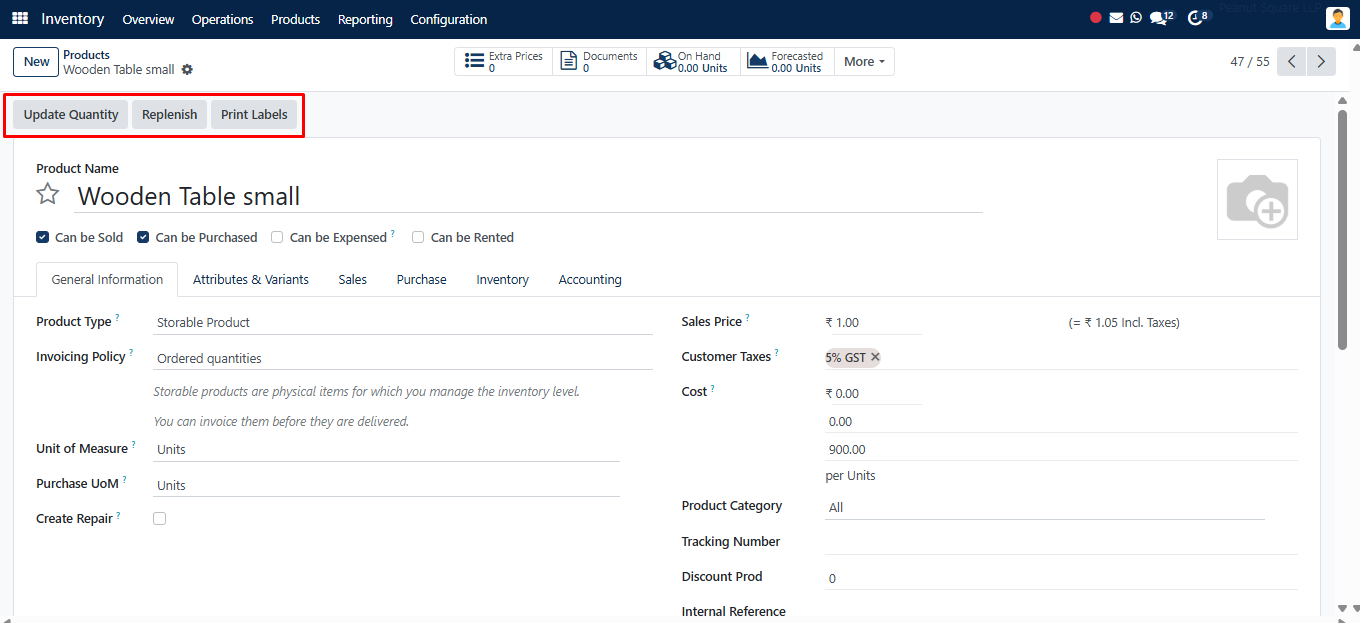
Use Product Tools: Print Labels, Update Quantity & Replenish Stock
Once the product configuration is complete, you can use the Print Labels, Update Quantity, and replace buttons to print labels, update the inventory automatically, and replace the product’s stock.
A pop-up window will appear when you click the Print Label button, as seen below.
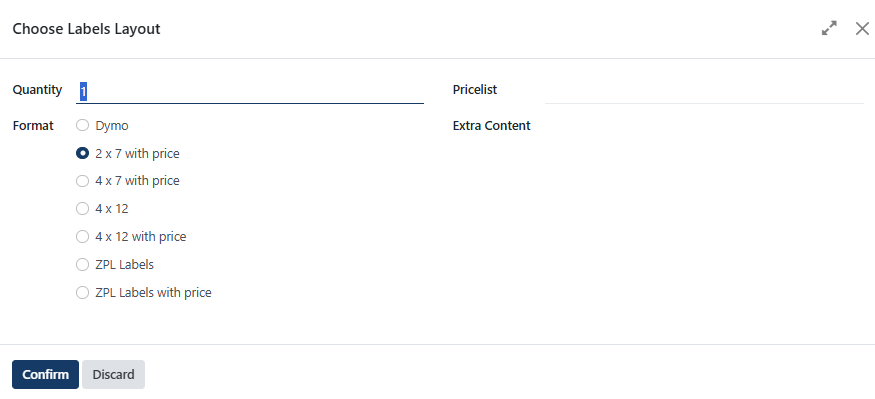
You can specify the total number of labels that are needed here. You can specify additional content that will print on the label when you take printouts in the Extra Content section. Once the appropriate Format has been chosen, you can press the Confirm button.
One example of a label like this is in the screenshot up top. It can be used on product packaging.