
Peanut Square SAS Logo
PricingAbout UsContact
+91 94296 94521Schedule Demo
SASKnowledgeSalesHow to Generate Invoice in the Sales module
Documentation
•Hub
Configuration Overview
  • How to Add Units of Measure
  • How to Create and Manage Product Attributes
  • Tags – Managing Sales Tags
  • How to Manage Shipping Methods
  • How to Manage Quotation Templates
  • Sales Module Settings: Configure Pricing, Quotes & Invoicing
Products Overview
  • How to Manage Discounts, Loyalty & Gift Card
  • How to Use Pricelists Effectively in Sales Module
  • How to Add and Manage Product Variants & Attributes
  • How to Add a New Product – Product Setup Guide
Manage Sales
  • How to Generate Invoice in the Sales module
  • Features of the Sales Module
Order Management
  • How to Add and Manage Customer Records
  • How to Manage Sales Team
  • How to Manage and Create Sales Order
  • How to Create a Quotation in Sales module
SalesSales
Manage Sales
2 min read

How to Generate Invoice in the Sales module

Once the Sales Order has been confirmed, the following step is to generate invoices for the orders. The moment you complete the sales order, the button to generate the invoice will show up on the screen.
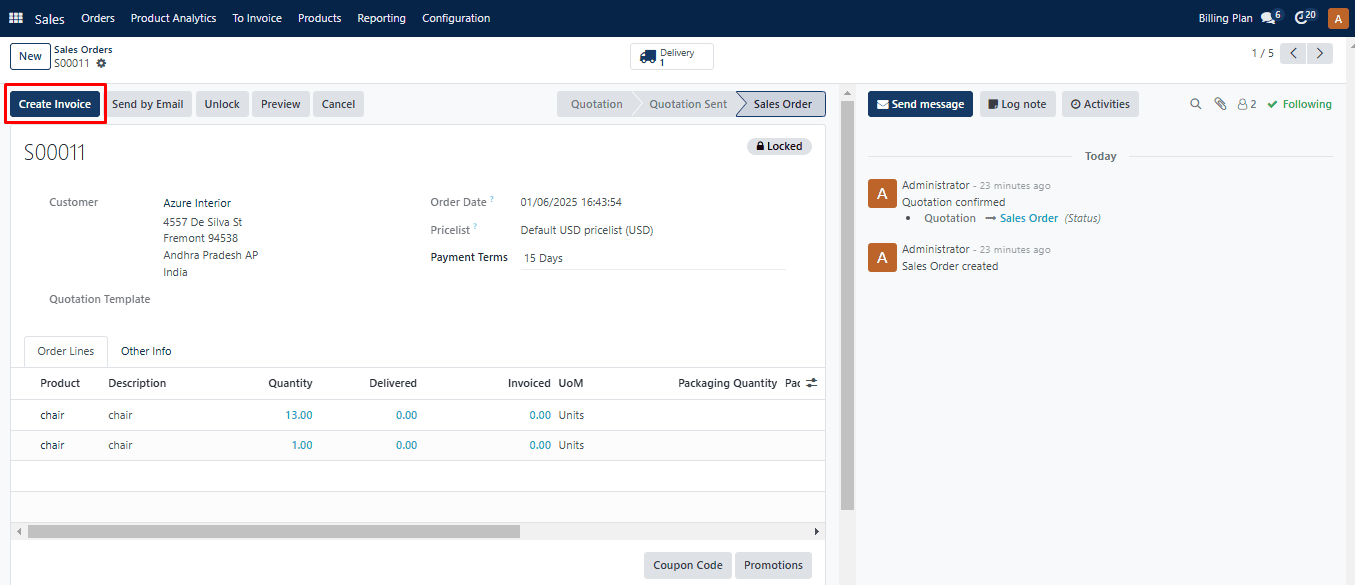
Create Invoice Button

When you click the Create Invoice button, a pop-up window will appear.
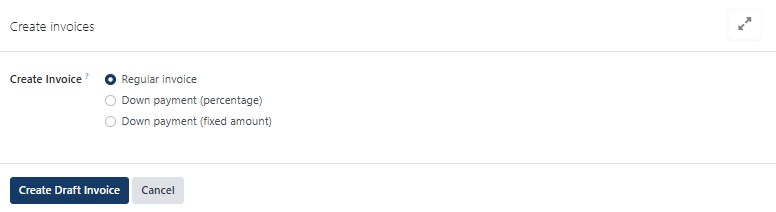
Choose Invoice Type

You may choose the invoice type here. There are three options: percentage-based down payment, fixed-amount down payment, and regular invoice. Click the Create and View Invoice button after choosing the appropriate payment method.
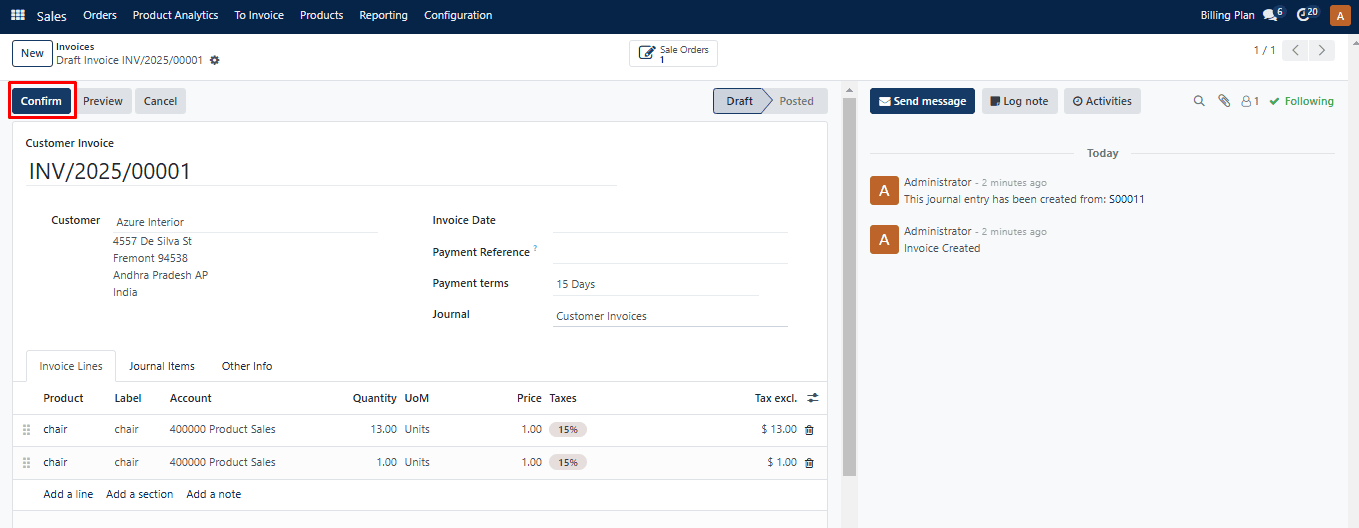
Generate Invoice

This will generate a draft invoice, which may be verified by clicking the Confirm button.
After you confirm the invoice, you will be given the opportunity to Register the Payment.
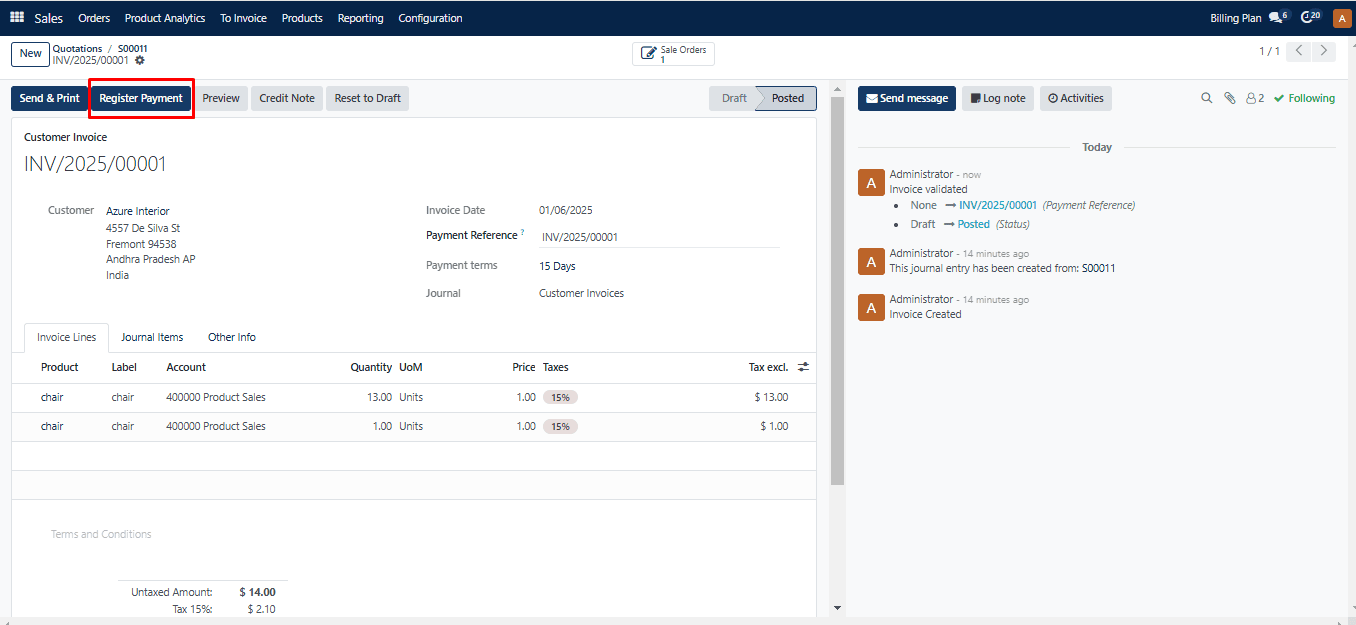
Invoice Payment

You may record the customer’s payment by using this button. In the pop-up box, you may add the payment details.
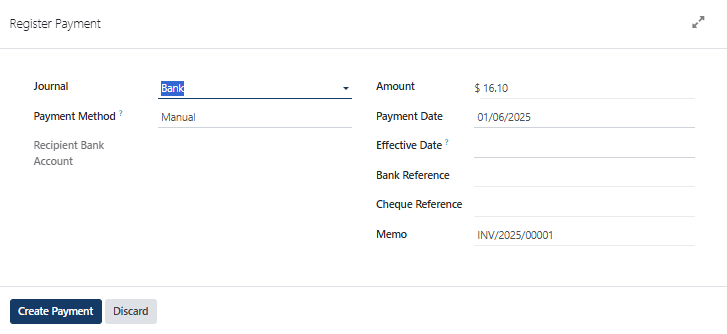
Invoice Bank Account

This window will provide the specifics of the Amount, Payment Date, and Memo. The Journal, Payment Method, and Recipient Bank Account can all be specified. Press the “Create Payment” button now.
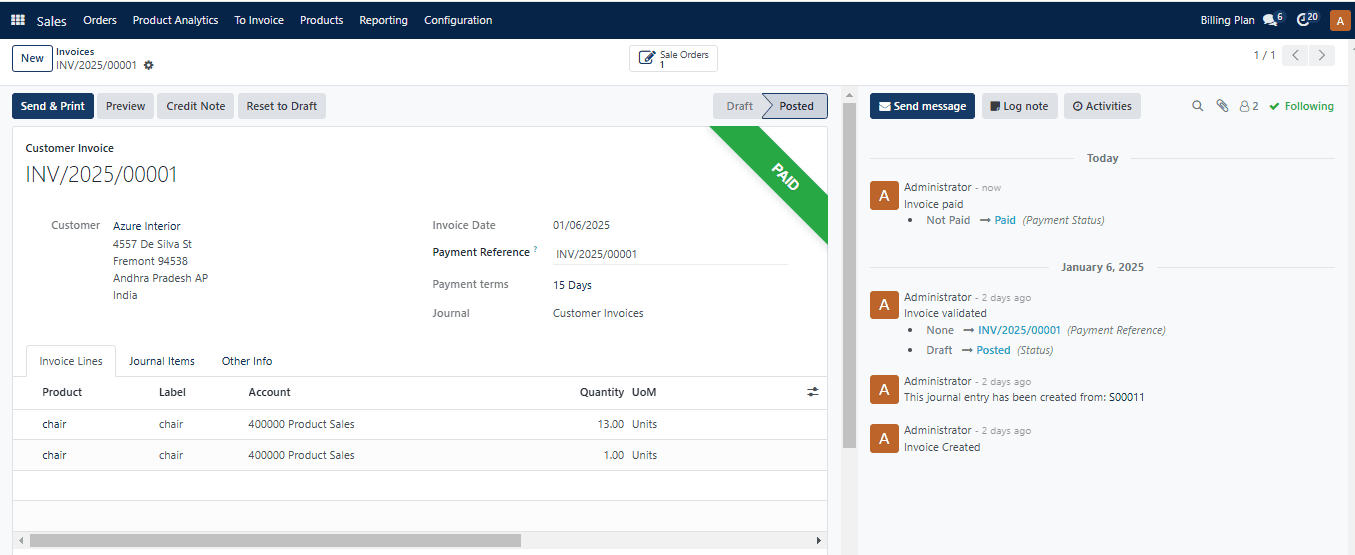
Invoice Print

After making the payment, the invoice will be marked as Paid, as seen in the screenshot above. Use the Send & Print option to send the invoice to the appropriate customer.
In the To Invoice menu, you will see a distinct platform for viewing all Orders To Invoice and Orders to Upsell.
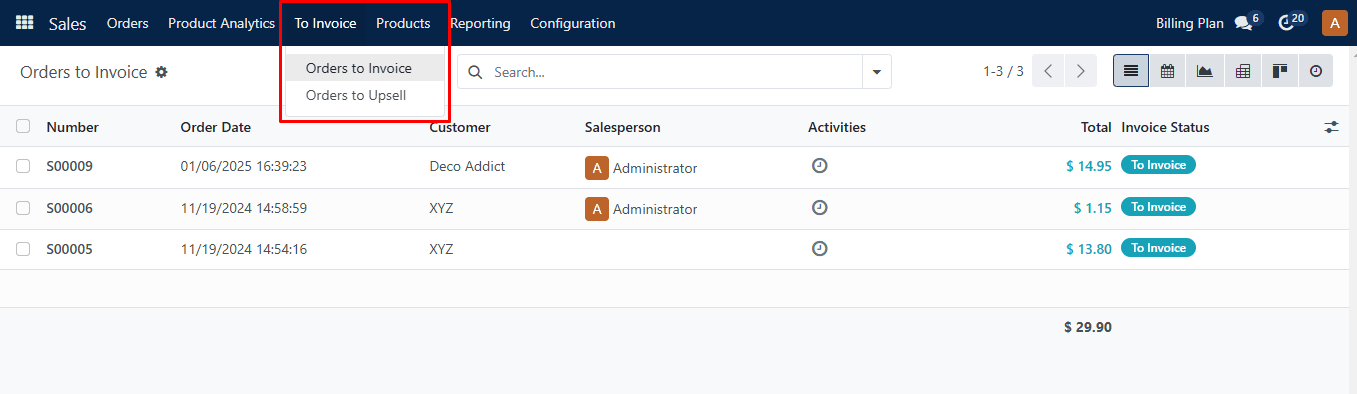
Invoice Viewable

All invoices are viewable on all platforms, along with their Number, Order Date, Website, Customer, Salesperson, Activities, Company, Total, Invoice, and Status. The orders that are awaiting an invoice will be shown on the Orders To Invoice portal. Orders where the the delivered amount exceeds the billed quantity will be transferred to the Orders to Upsell option. In these situations, you must create an invoice for the excess amount that was sent to the client. It will instantly create a sales order for this additional amount, which you can locate under the Orders to Upsell option.

Was this guide helpful?
Your feedback helps us continuously improve our SAS playbooks.
Previous Article
How to Add a New Product – Product Setup Guide
Next Article
How to Add and Manage Customer Records

Need help configuring your SAS modules?

Speak with a Peanut Square SAS solution architect to assist with custom onboarding and team trainings.

Schedule ConsultationKnowledge Hub
Peanut Square SAS Logo

Join us at Peanut Square LLP and watch your business soaring to new heights with our state-of-the-art technology based IT solutions.

Certified ISO 9001:2015 Company
Certified ISO 27001:2022 Company

Need Help ?

  • Apps
  • Industries
  • Resources
  • About Us
  • Contact
  • Privacy Policy
  • Terms and Conditions
  • Cancellation and Refund Policy

Partners

  • viaSocket

Contact Information

C-306 Signature-2, Nr. Sarkhej-Sanand Cross Road, Sarkhej, Ahmedabad, Gujarat-382210
sas.sales@peanutsquare.com

© 2026 Peanut Square LLP. All Rights Reserved.