Lot & serial numbers are critical for traceability in inventory management. Lot & serial numbers enable businesses to track products from production to delivery. In SAS Inventory, lot numbers refer to a batch of products with shared characteristics, while serial numbers identify individual units. Effective use of lot & serial numbers helps maintain quality control, handle recalls, and ensure compliance.
Comprehensive Steps to Track Products Using Lot & Serial Numbers in SAS Inventory
Enable Lot & Serial Number Tracking
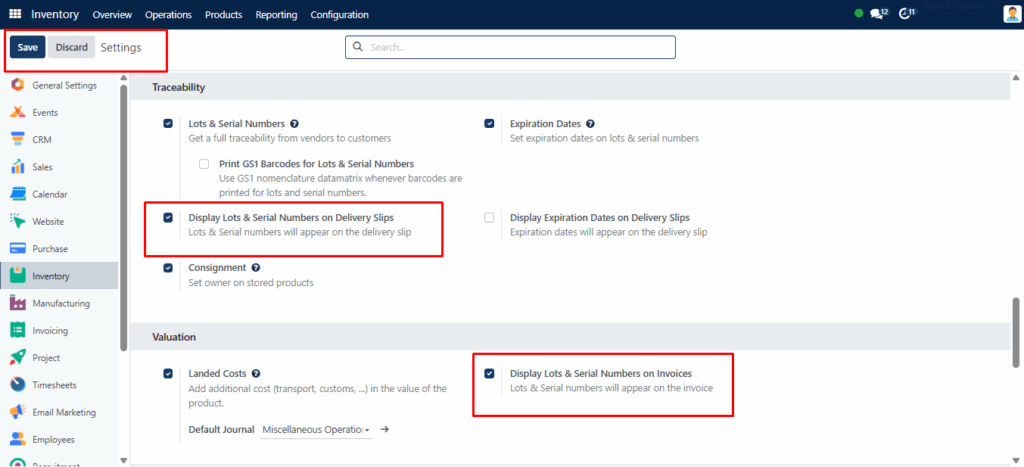
You can activate the Lots & Serial numbers inside the “Traceability” tab of the “Settings” page of the “Configuration” menu, as shown below.
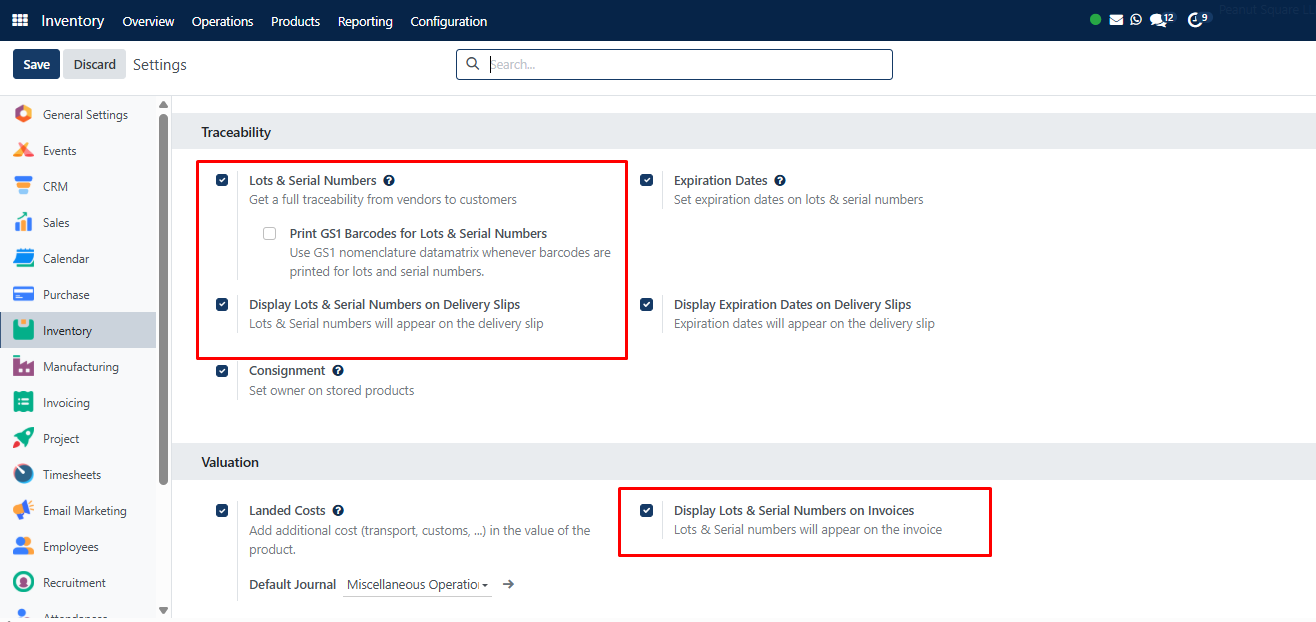
Also, enabling the “Display Lots & Serial Numbers on Invoices” option inside the “Valuation” tab will be helpful to display the product lot numbers inside any order invoices that contain this specific product.
Navigate to Configuration > Settings > Traceability in SAS Inventory and enable:
- Lots & Serial Numbers
- Display Lot & Serial Numbers on Invoices (under “Valuation” tab)
This ensures your documents include traceability data for better order tracking.
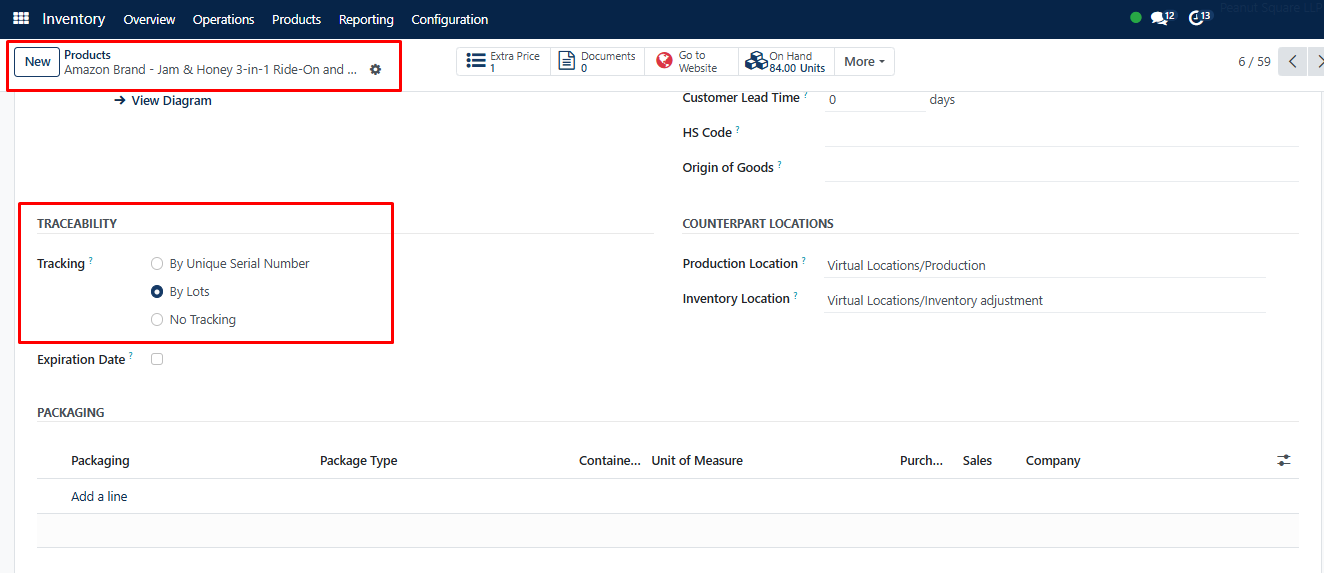
Traceability in Product Forms
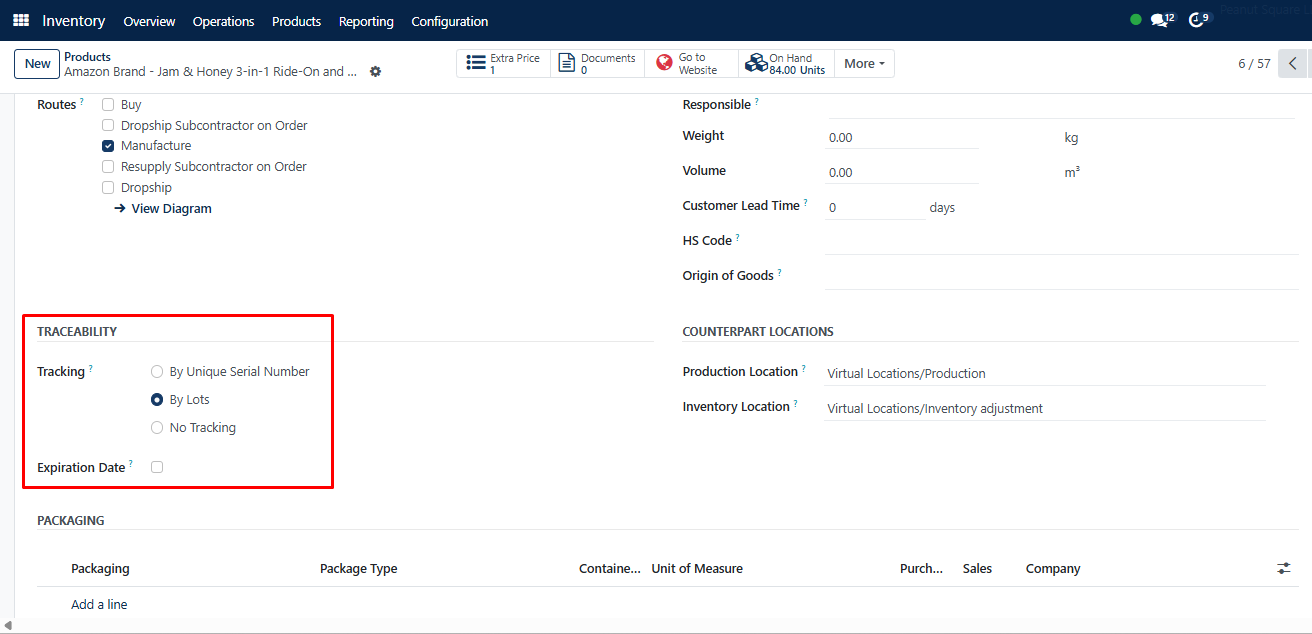
To check the traceability of the product inside forms, we can go to the “Inventory” tab section of the form view of any product. While you are configuring product data inside your inventory, the product is trackable in two different ways. Now, Let’s look at a product configuration form as shown below.
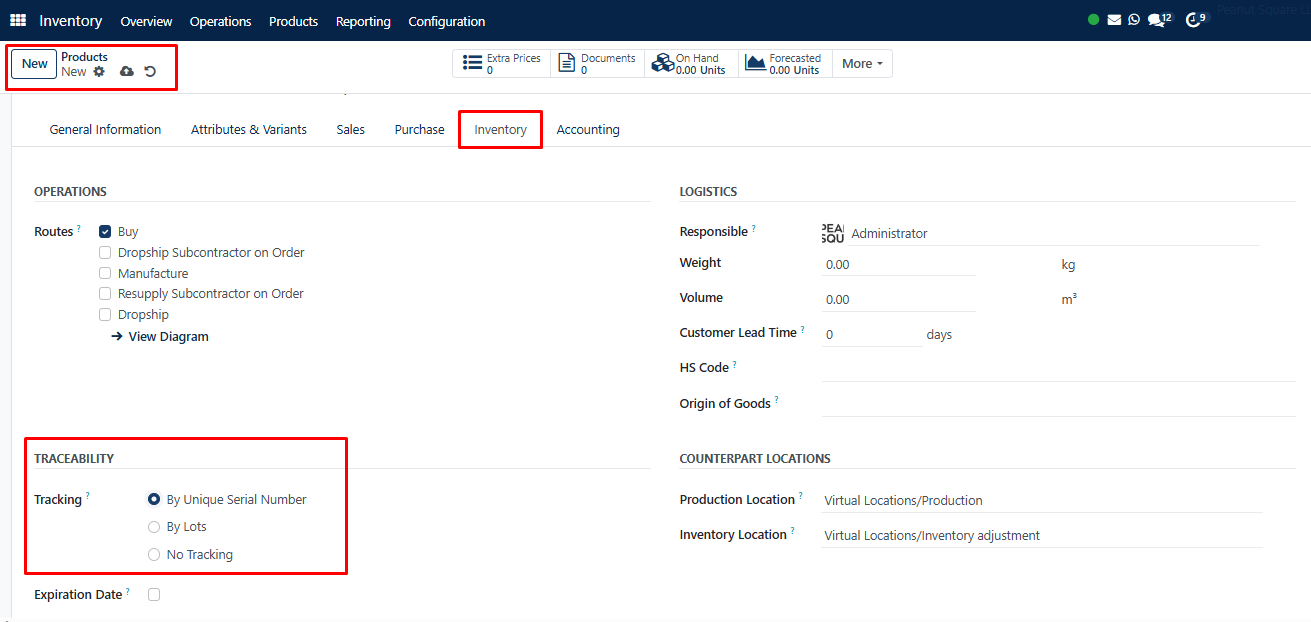
In the product form, go to the Inventory tab and configure tracking under the Traceability section:
- By Unique Serial Numbers
- By Lots
- No Tracking
Serial numbers are for individual tracking, while lot numbers group items with similar properties.
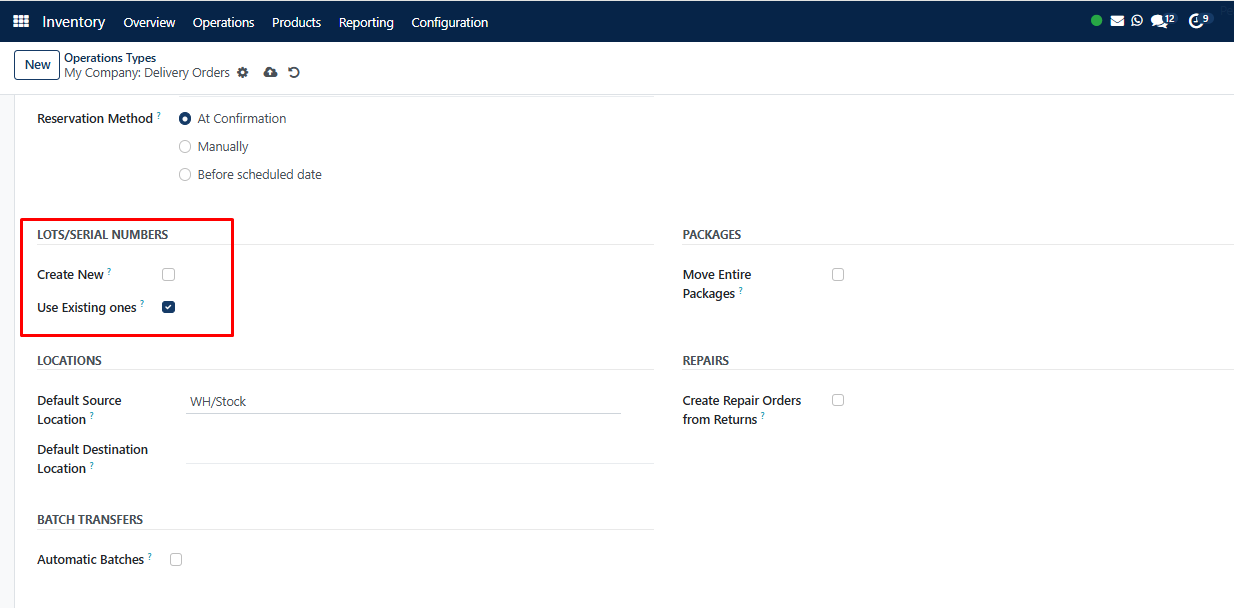
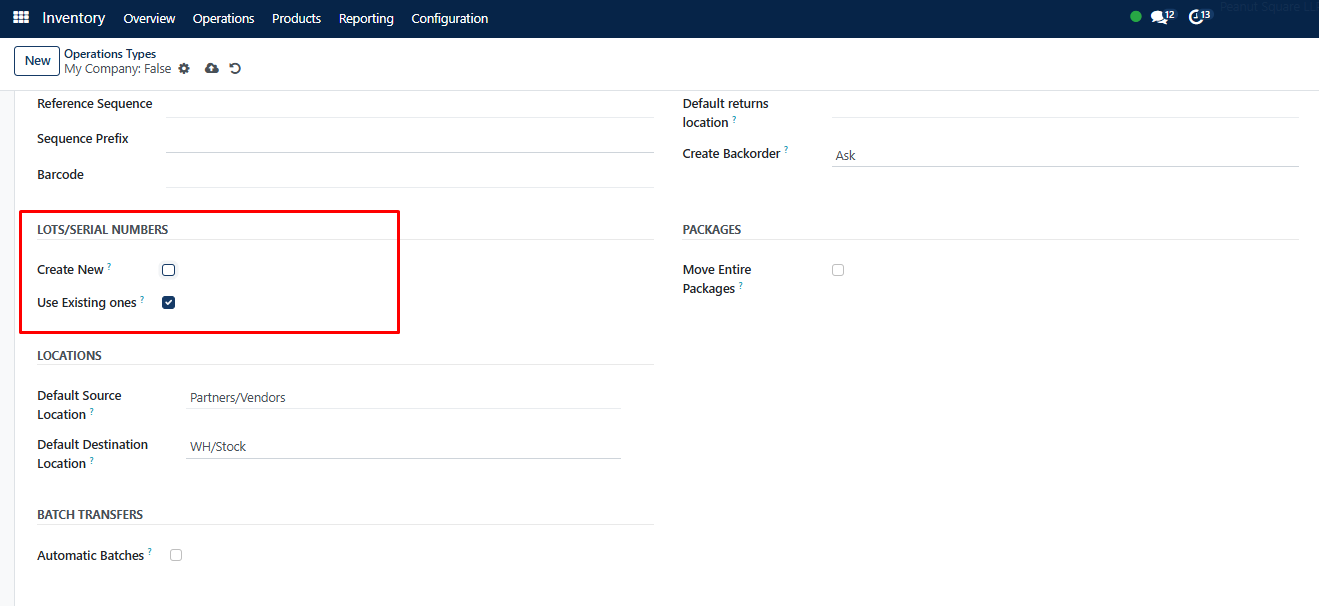
Configure Operation Types
Access Configuration > Operation Types. In the LOTS/SERIAL NUMBERS section, you can:
- Use existing lot/serial numbers
- Create new ones on demand
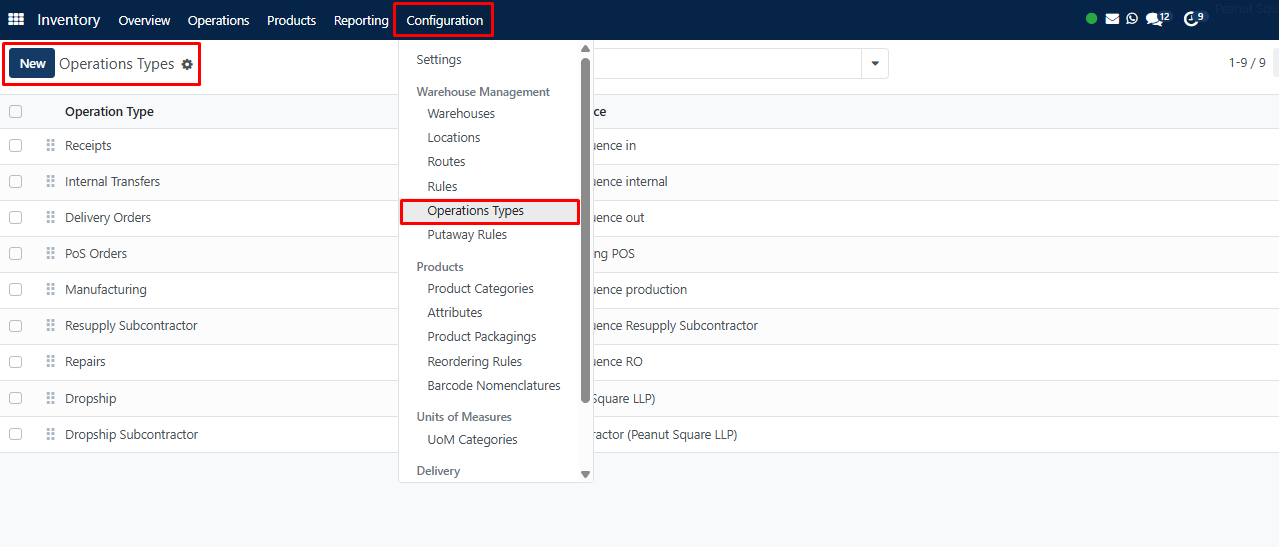
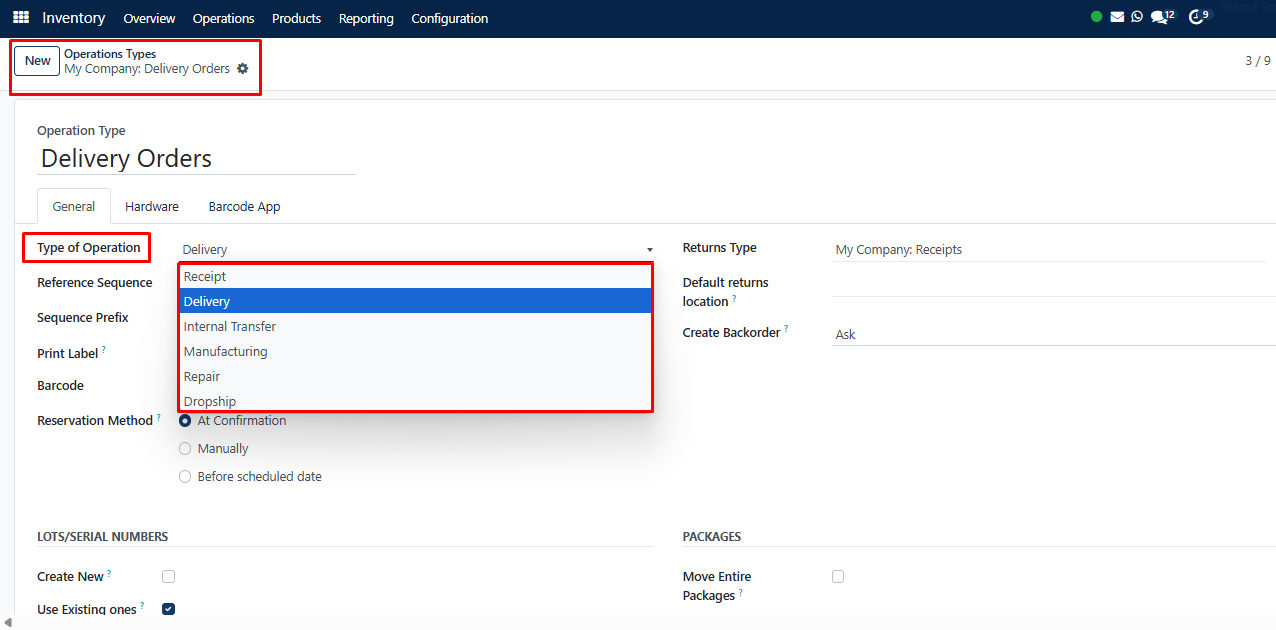
Operation types include Receipt, Delivery, Internal Transfer, Manufacturing, etc.
Inside the “LOTS/SERIAL NUMBERS” section, you can see two options such as “Use existing” and “Create new.” When purchasing a product, users have the option to select pre-existing lots and serial numbers or generate new ones, as depicted below.
Track Products with Serial Numbers
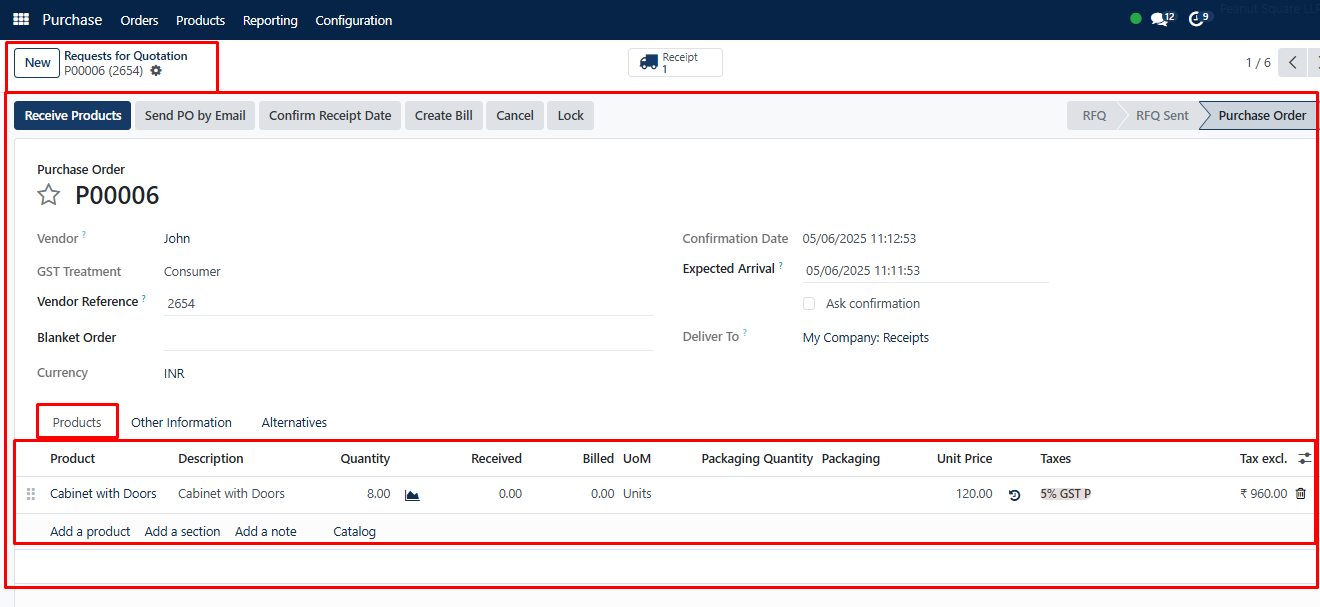
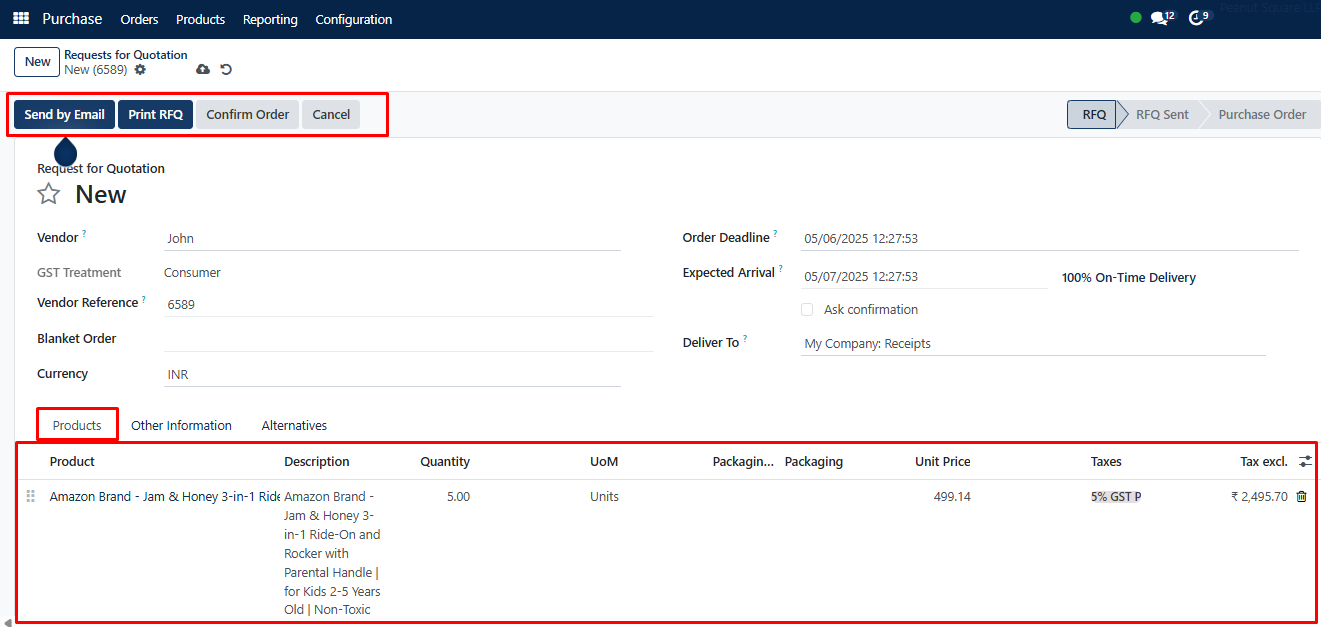
If a customer or vendor places a purchase order or any quotation, they can track or trace their product or order using the unique serial number that we have provided in the product’s configuration form. So we can set the “Traceability” for the product.
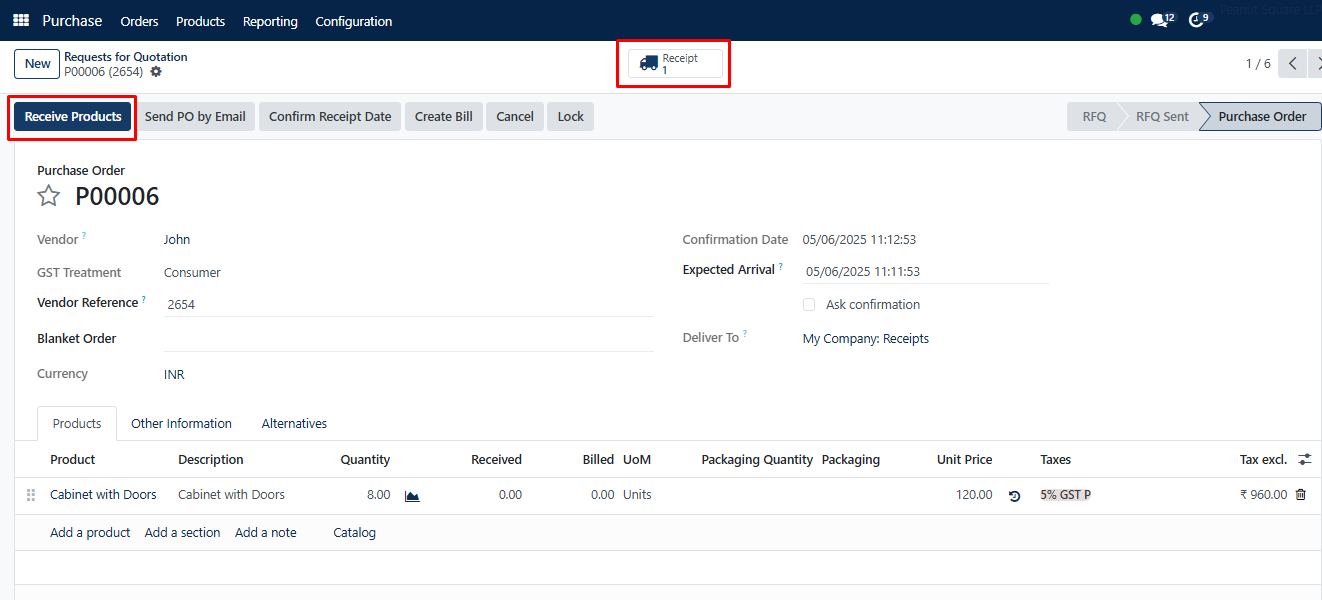
- Create a purchase order from the Purchase Module.
- Add products with tracking enabled by Serial Numbers.
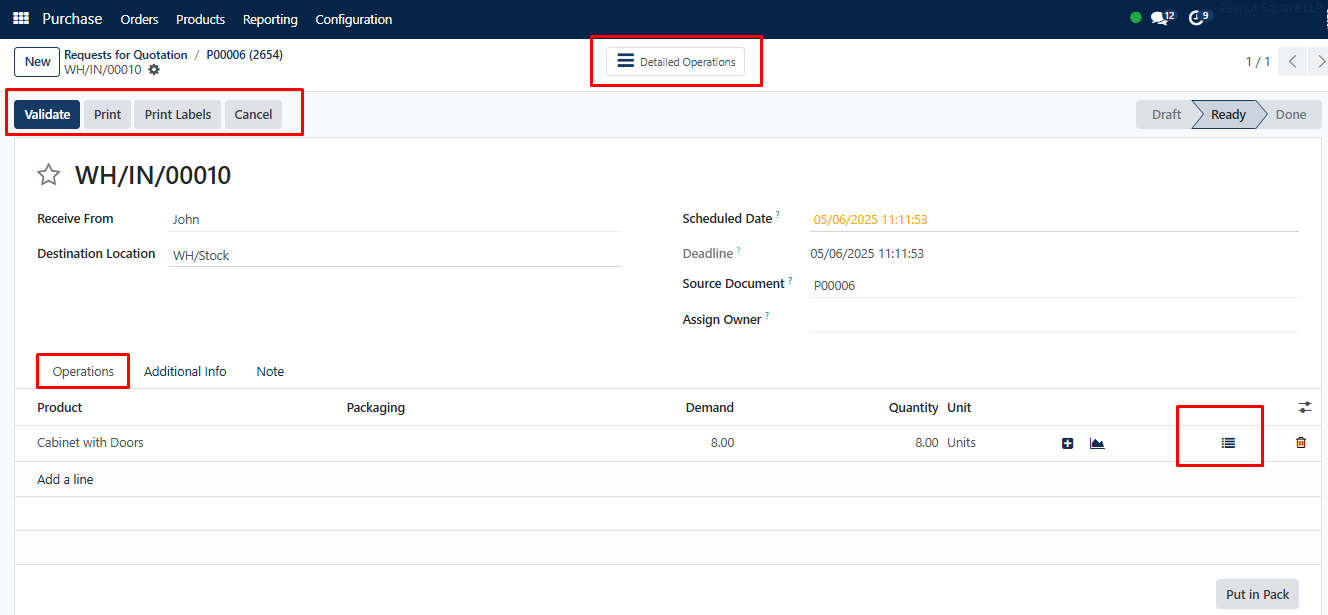
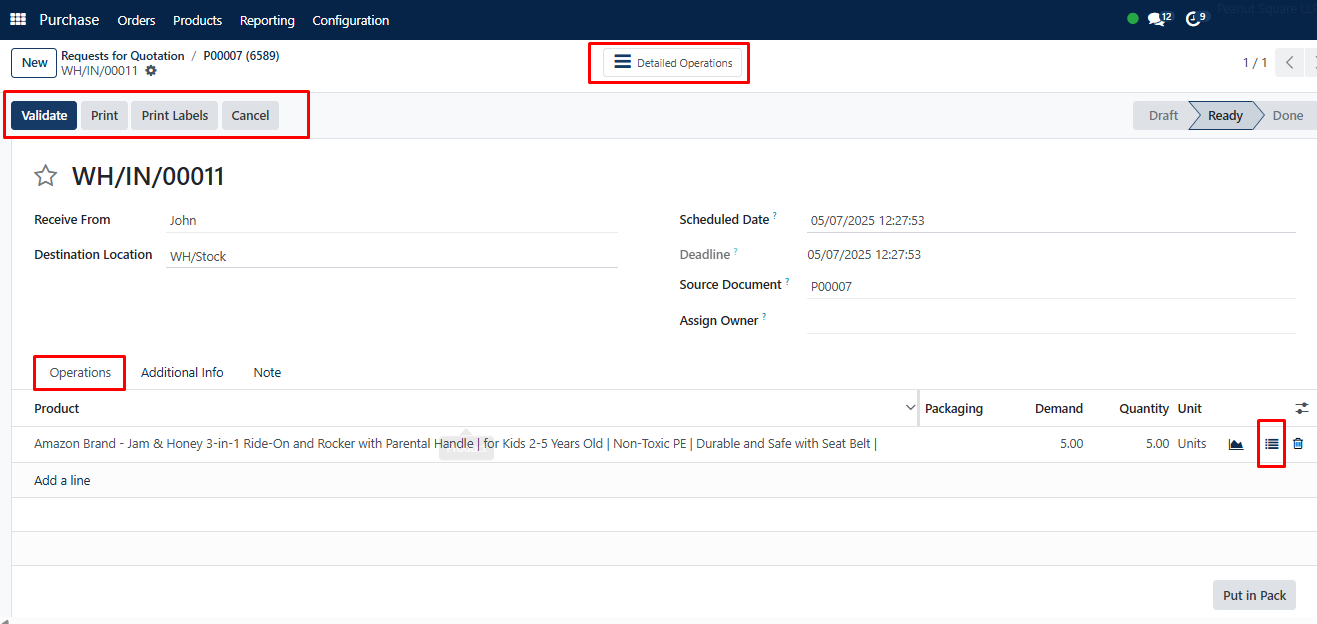
- Confirm order, go to the Receipts tab, and validate.
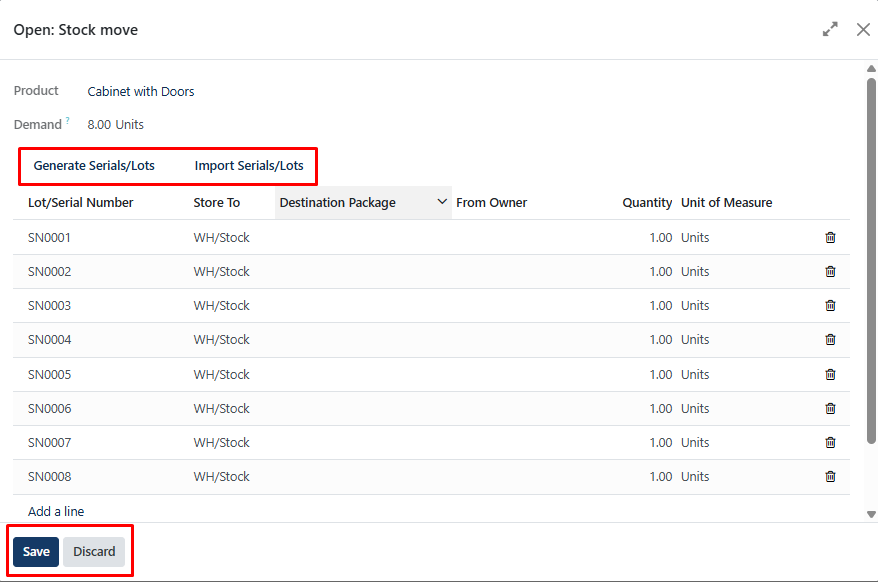
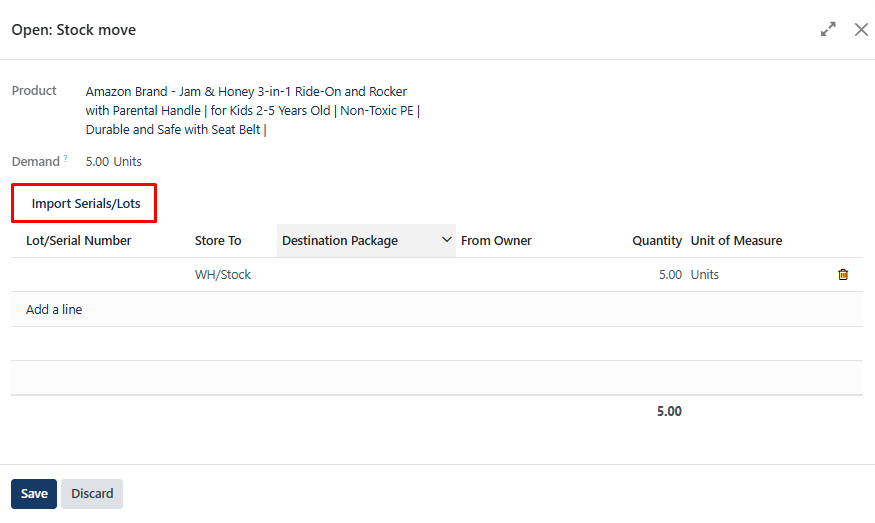
- In the Operations tab, generate serial numbers manually or click Generate Serial Numbers or Lot Numbers.
Track Products with Lot Numbers
- Choose a product with “By Lots” traceability.
- Create and confirm a purchase order.
- In the Receipts dashboard, use Operations to generate lot numbers.
- Assign or import custom lots (e.g., LT-001 for a pack of 5).
This helps trace product batches throughout the supply chain.
No Tracking Option
If “No Tracking” is selected in a product’s form, SAS will not generate or require lot/serial numbers during the order process. You will only set stock move locations during delivery validation.
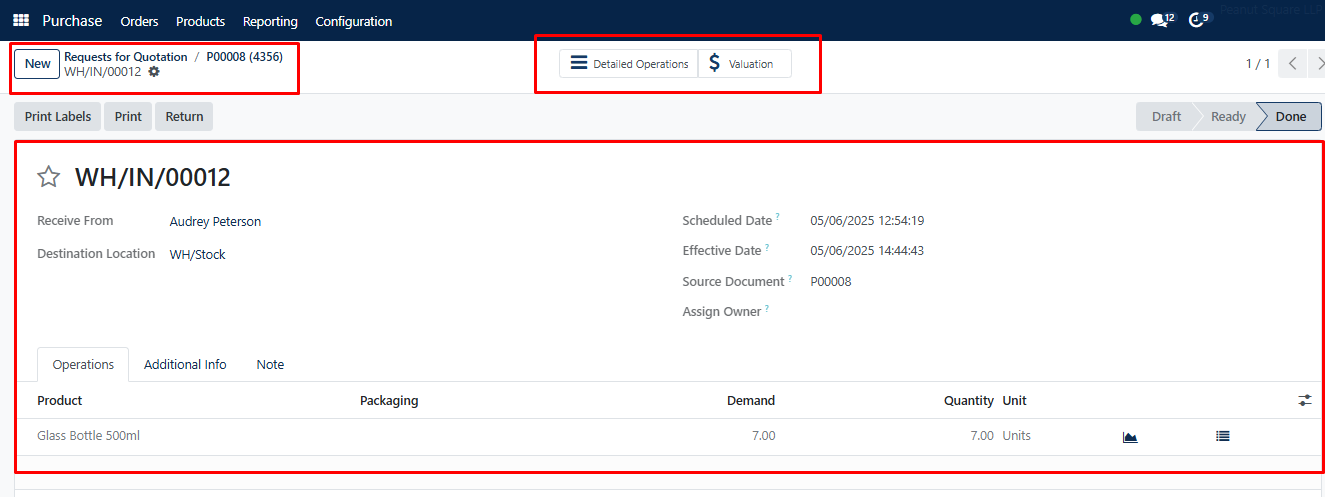
Create a new purchase order with the chosen product from the SAS Purchase Module, Edit the order details, and Save and Confirm the order.
The product details are visible within the “Receipt” smart button. The pop-up window that we received for generating Lot & Serial Numbers in the previous scenarios, as shown below, will appear if you attempt to open the menu located within the “Operations” tab. Here, we can’t produce any tracking Lots or Sequences but only set the stock move locations.
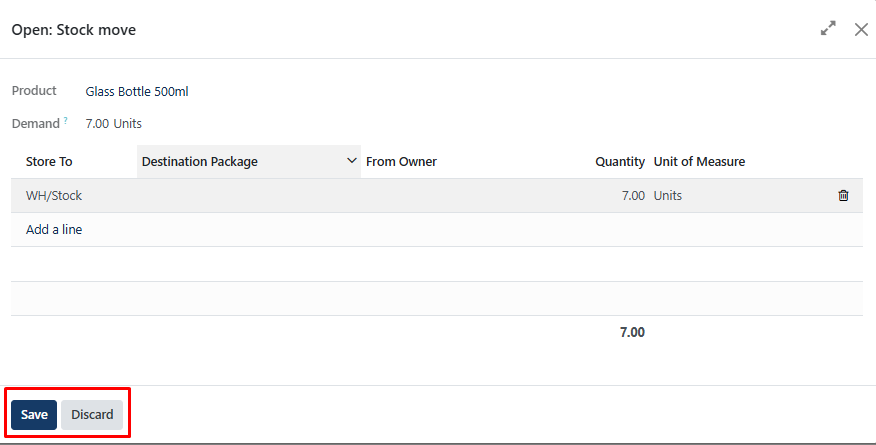
Return to the order configuration page after saving the details of the stock move. We won’t receive the “Traceability” smart button and won’t be able to track the products using lot or serial numbers if we validate the order.
Using Existing Lot/Serial Numbers
- In Operation Types, select “Use Existing One” under tracking settings.
- When fulfilling an order, choose from available lot/serial numbers.
- This is useful for returned items or restocks.
Manual Lot/Serial Number Configuration
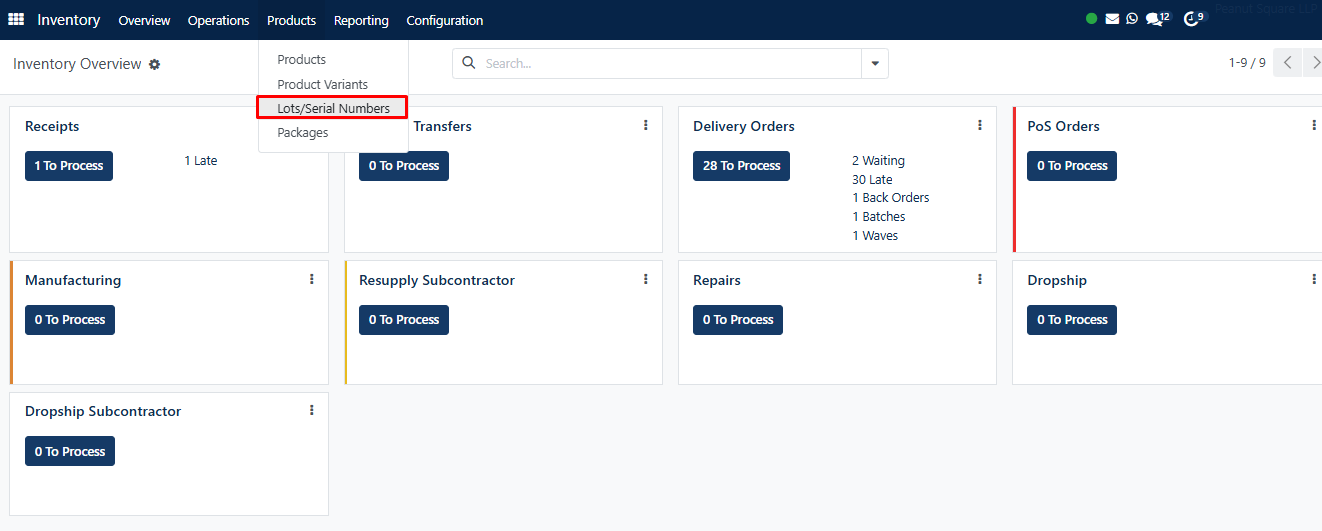
Use Products > Lot/Serial Numbers to view or manually create entries.
- Enter a number (e.g., LOT-0000023)
- Assign a product
- Add internal references for manufacturer differences
This provides tighter control over product traceability.
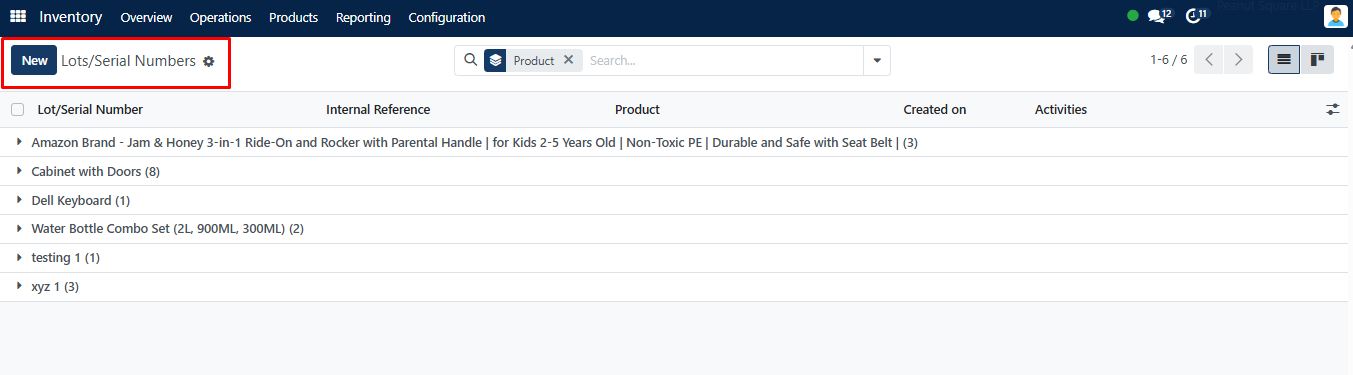
We can create a new Lot Number using the “New” button. Edit the required fields in the displayed form.
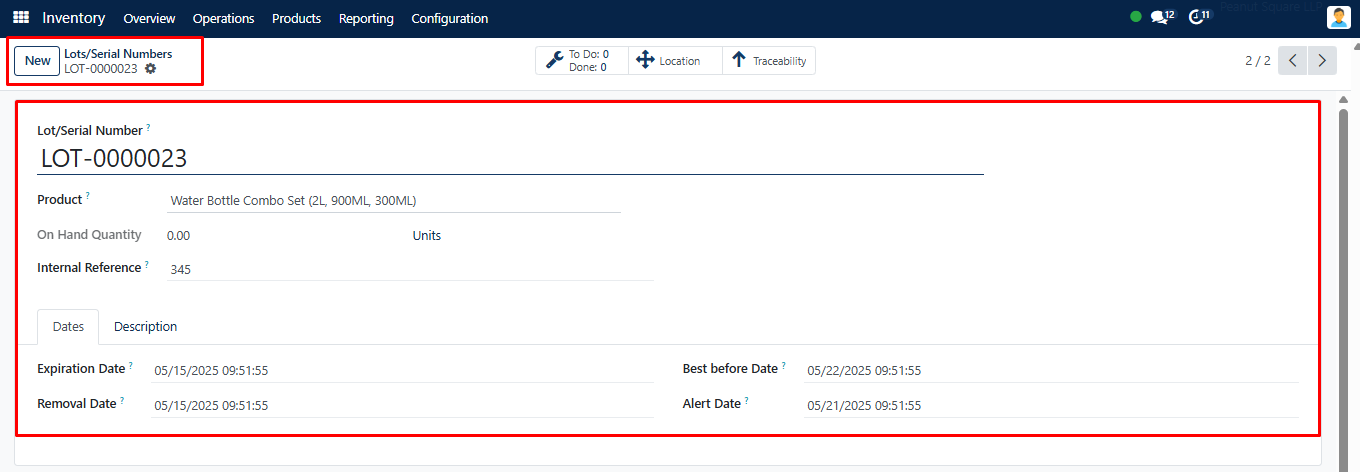
You can enter the ‘Lot & Serial Numbers’ and select the ‘Product’ that uses this lot & Serial Numbers on the aforementioned form.
When a product uses this lot number, the quantity will also automatically update. If the lot/serial number is different from the manufacturer’s, use it as an “Internal Reference.” Here, I have configured a lot number as LOT-0000023.
Now, Let’s create a delivery order using the purchase module, Edit the required fields, Save the data, and Confirm the purchase order.
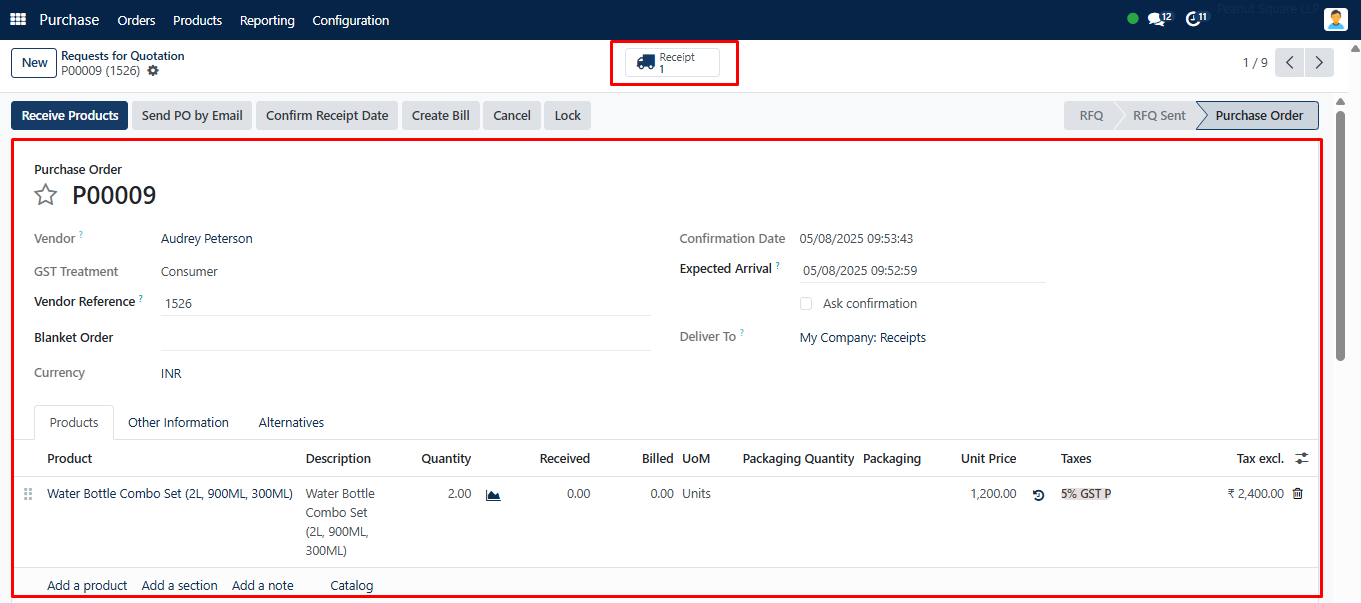
Go to the “Receipt” smart button section and try to generate a Lot Number using the menu provided inside the “Operations” tab section.
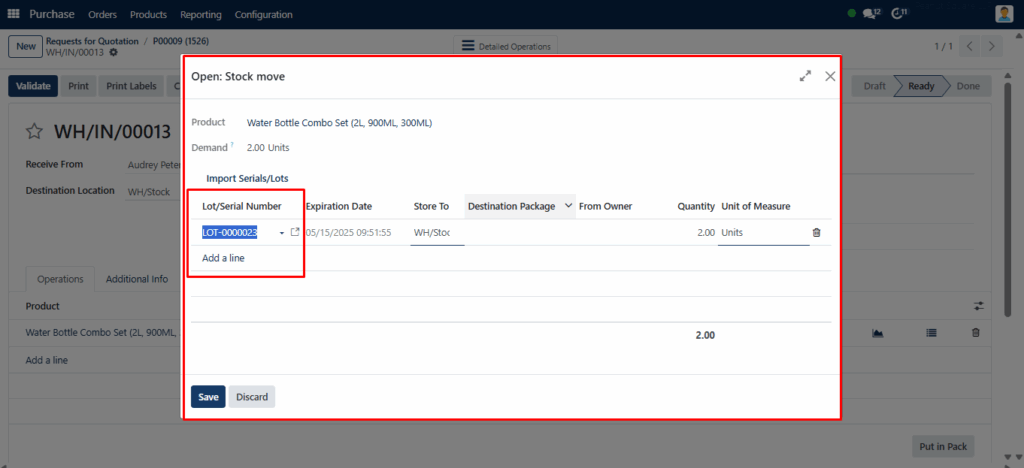
Choose the Lot Number that we have created above inside the stock move window’s Lot/Serial Number field and save the data.
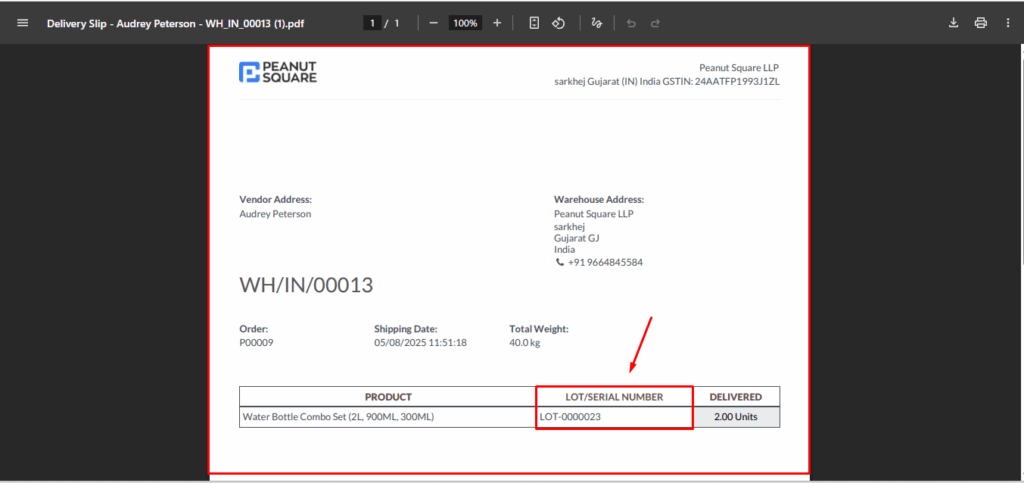
Display Lot & Serial Numbers in Invoices
To show tracking data on invoices or delivery slips:
- Enable display setting from
Inventory > Settings. - Confirm and validate the purchase order.
- Click Create Bill > Create Payment.
- Use Print > Delivery Slip to generate the invoice with lot & serial details.
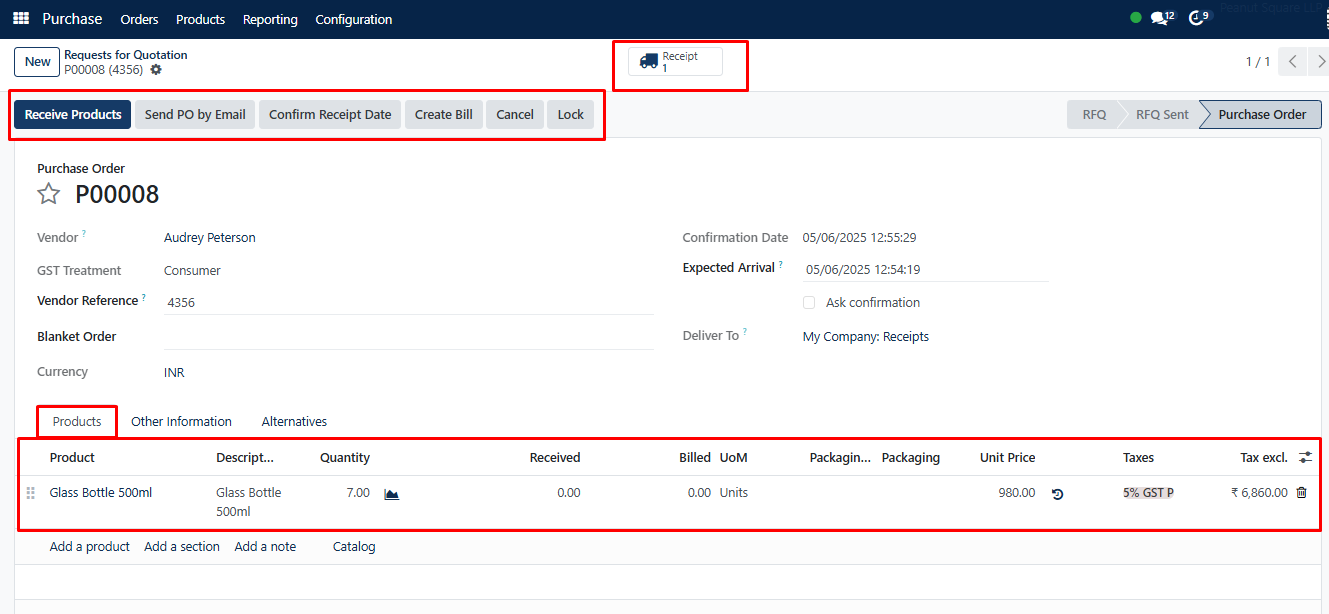
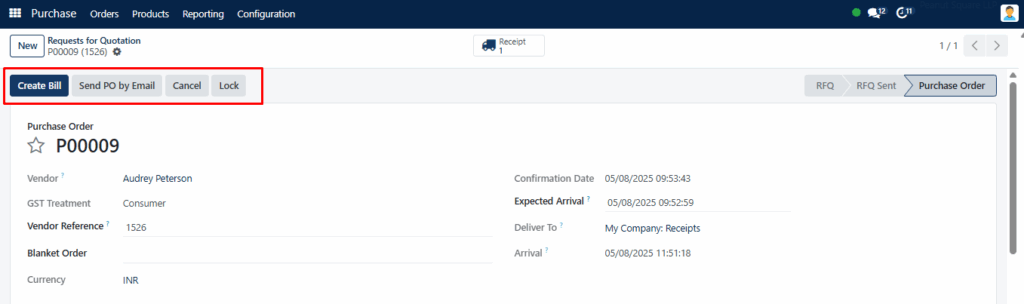
Now, you can bill a purchase order after confirming and validating the order using the “Create Bill” button.
After creating the bill and making payments using the “Create Payments” button, you can go to the “Receipts” section.
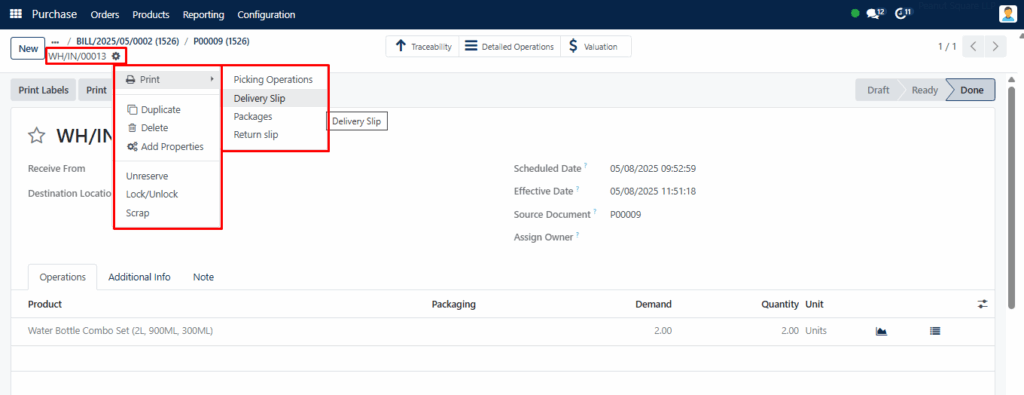
Then click on the “Delivery Slip” option available in the “Print” action menu. This will download the delivery slip of your order, where you can see the product lot numbers, as shown below.