Create and track purchase orders with detailed product and pricing info using the Purchase module or Orders menu to streamline supplier communication.
The purchase order is regarded as a sort of contract that details the specifics of the product’s purchase and pricing and is signed by the customer and the vendor. The business can create a buy order that includes all of the information about the product included in the purchase list in the purchase module and submit it to the supplier. Both the Request for Quotation and the “Purchase Order” option under the “Orders” menu can be used to generate the purchase order.
Steps in the Purchase Order Process
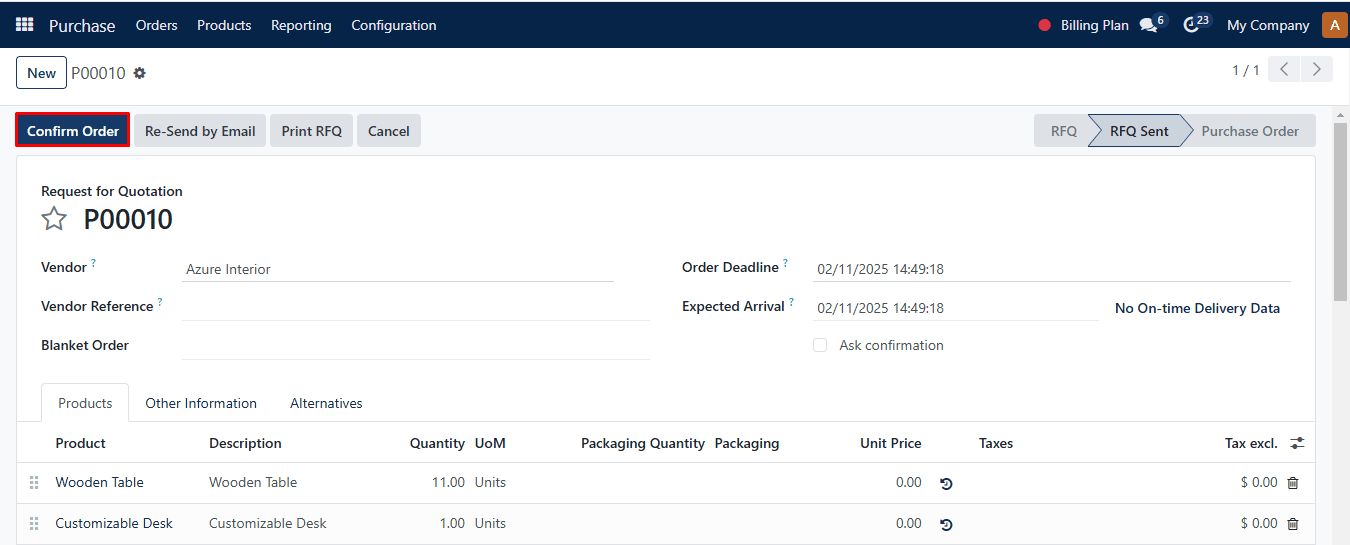
By using the “Confirm Order” button, as indicated in the screenshot, you can quickly turn the request for quotes into a successful purchase order if the vendor has responded favorably.
Choose the ‘Purchase Order’ option from the Orders menu located in the module’s main menu bar to generate a direct buy order. As indicated below, we will receive a list of purchase orders along with their current status.
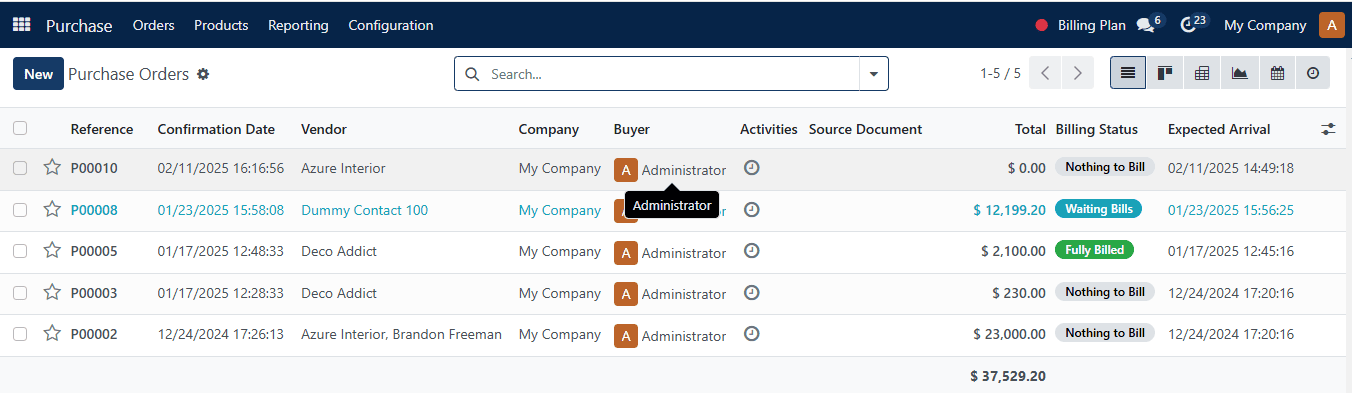
Reference number, confirmation date, vendor, company, receipt date, purchase representative, next activity, source document, total price, and billing status information will all be shown in the preview. To view a purchase order in detail or to make changes, simply select the relevant purchase order. Just like with any other SAS module, this platform offers many data views and sorting choices.
Create a new purchase order by selecting the ‘New’ option.
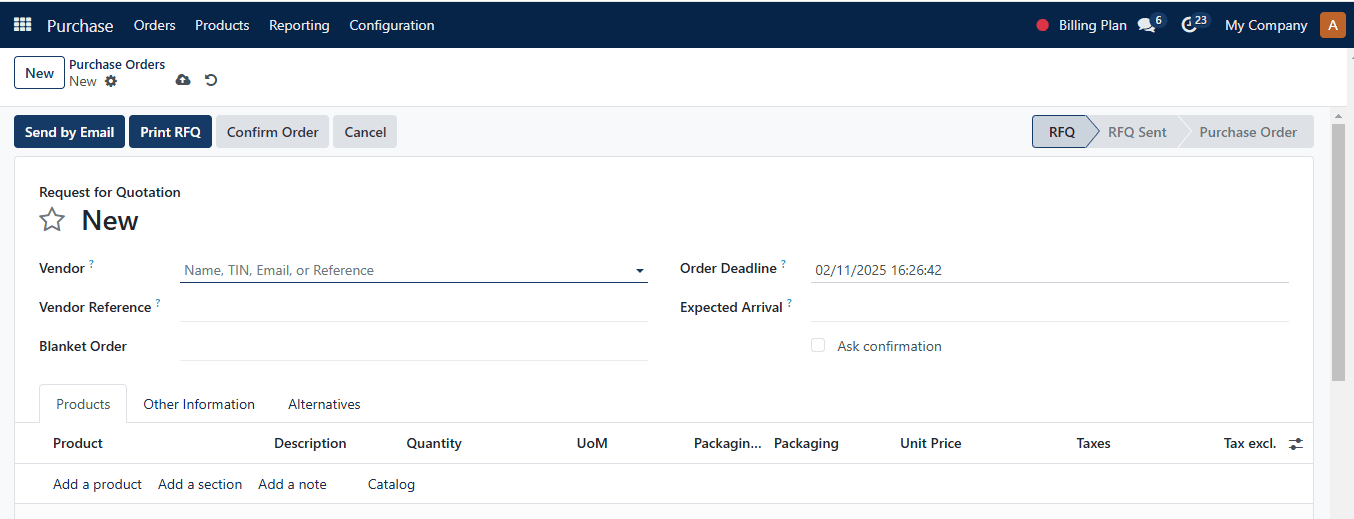
The process of generating a new purchase order begins with the same steps as creating an RFQ. In the designated fields, include information about the vendor, vendor reference, and purchase agreement. In the corresponding fields, include the Order Deadline, Receipt Date, and Deliver to Address information. Attach the product list you wish to buy along with any additional purchase order details beneath the form’s designated tabs.
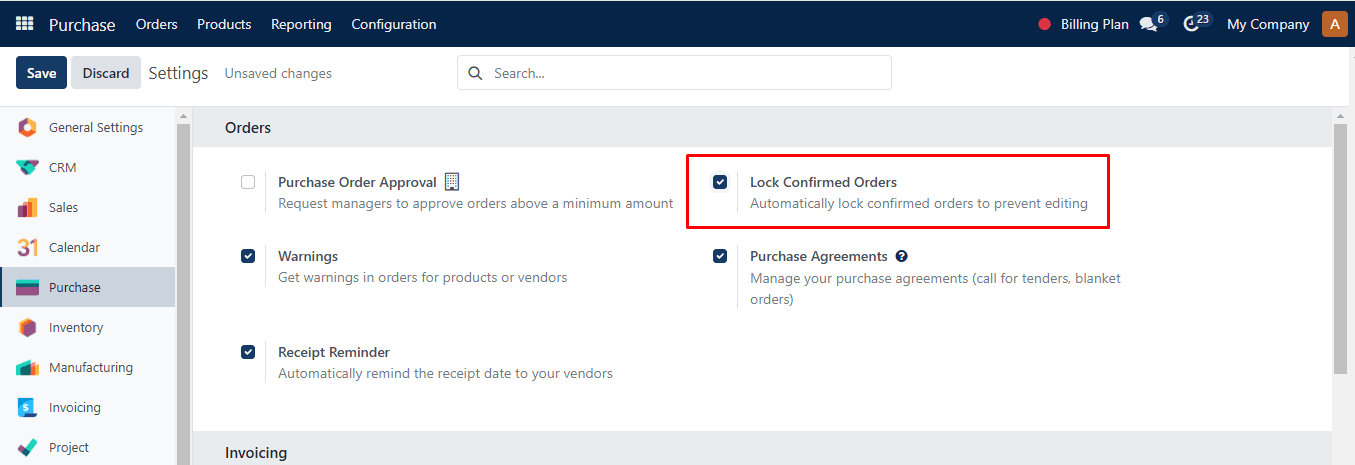
By selecting “Send by Email,” just like we did when creating the RFQ, you may email this to the chosen vendor as a request for a quote. You can use the “Confirm Order” button to confirm the transaction instantly and carry out the purchase. You can see that the status is Purchase Order. You can automatically lock confirmed orders to prevent editing by activating the Lock Confirmed Orders feature from the Settings menu.
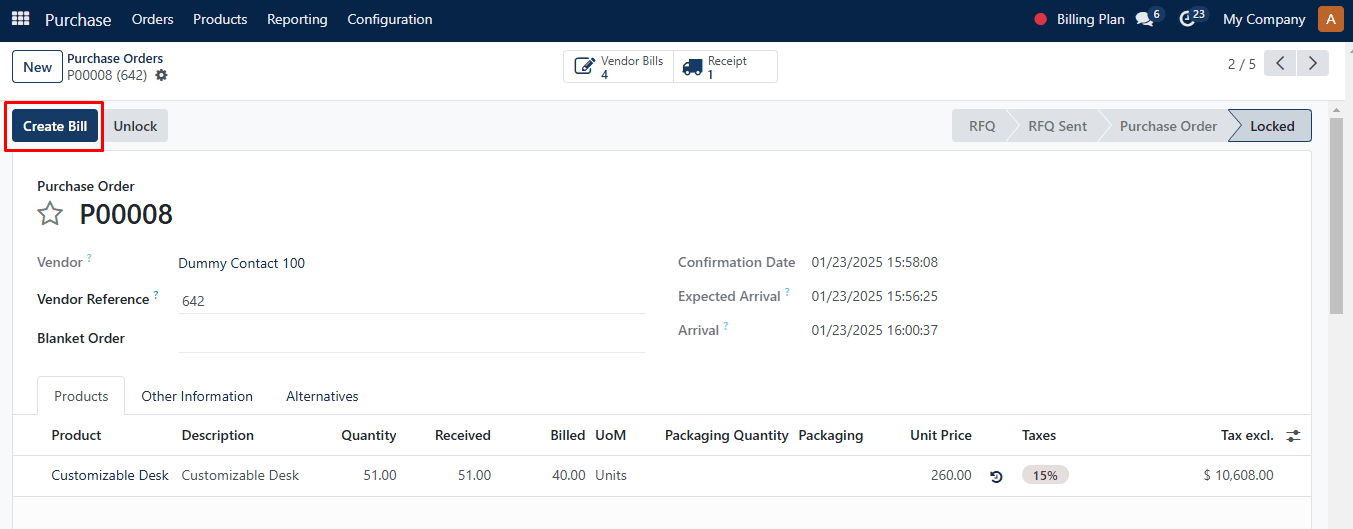
The order will immediately lock as soon as you confirm it, as seen below.
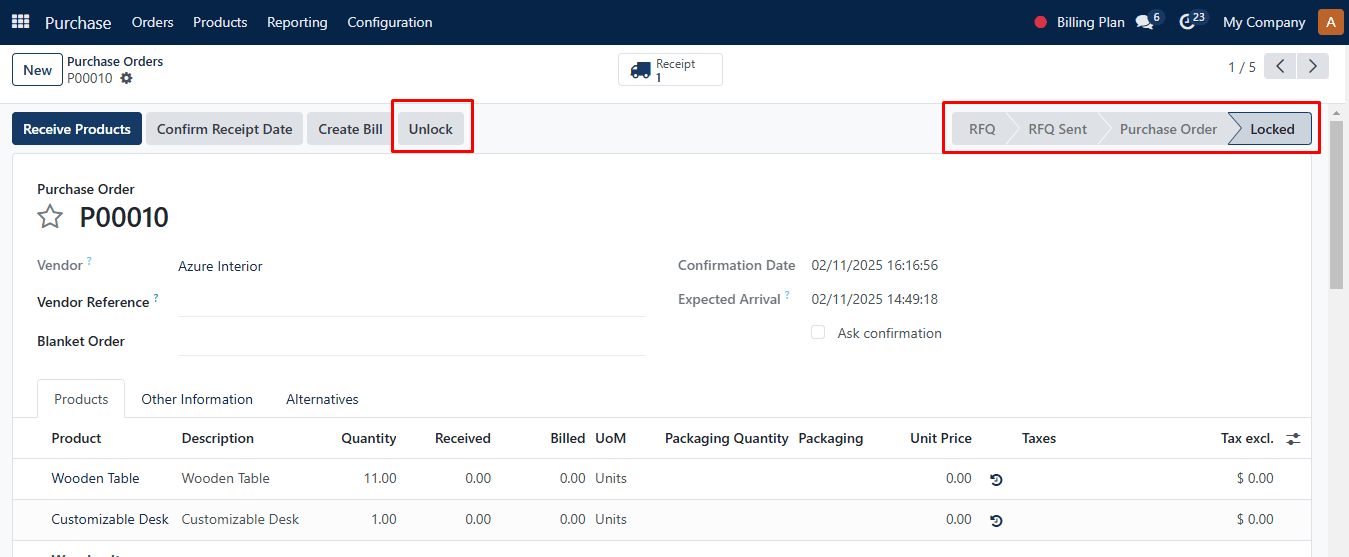
You can click the Unlock button to make any modifications to the confirmed order. You can see the “Create Bill” button to generate the bill on the payment after creating the purchase order.
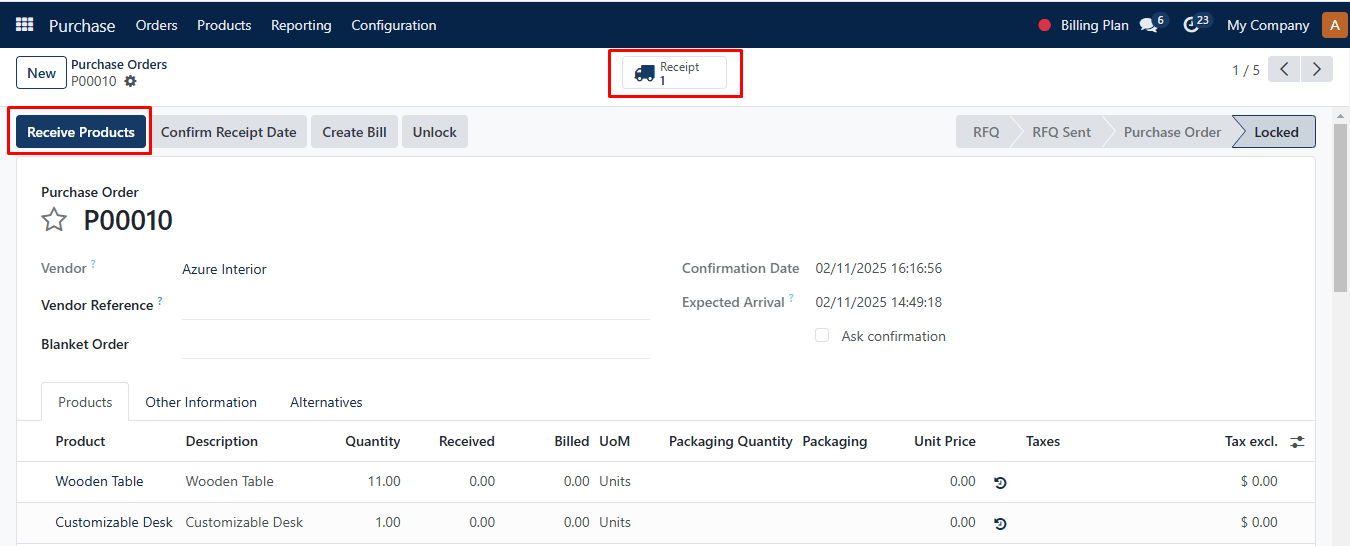
Receive Products
The merchandise will be sent to the location listed on the purchase order once the order has been confirmed. Using the Receive Products button, you can note product specifics at the time of delivery. To obtain information about the incoming package, you may also click the Receipt Smart button.
By selecting the Validate option, you can accept the merchandise and verify the receipt.
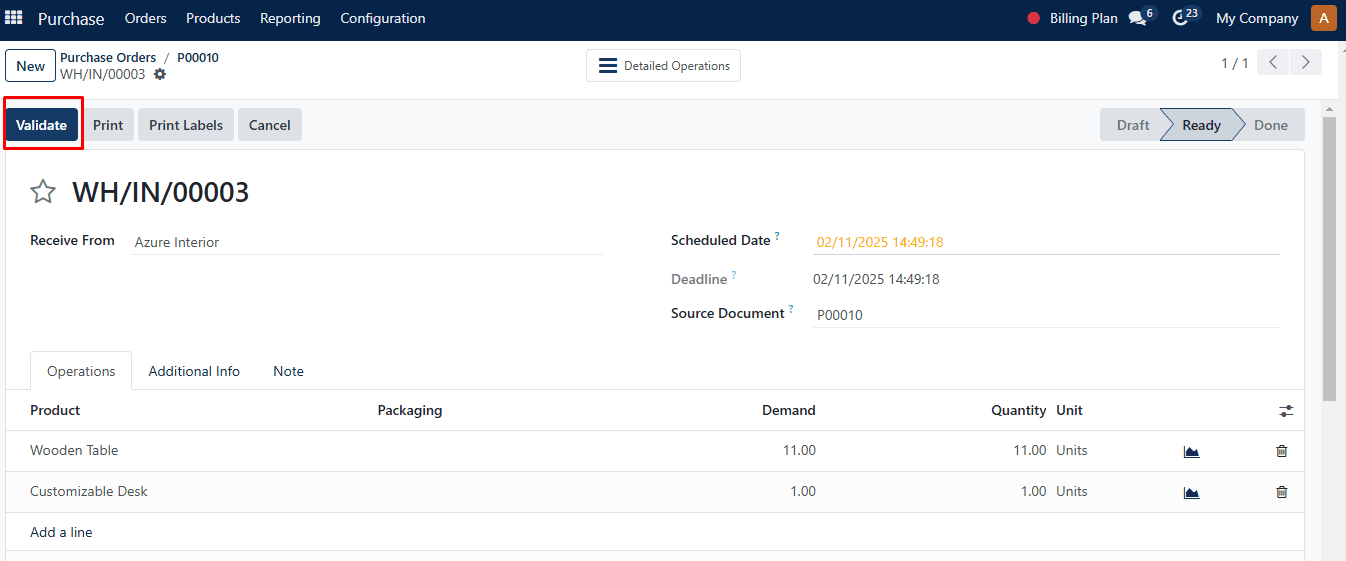
Once you verify the receipt, the delivery will be finished, and the new goods will be added to the inventory.
Vendor-Bills
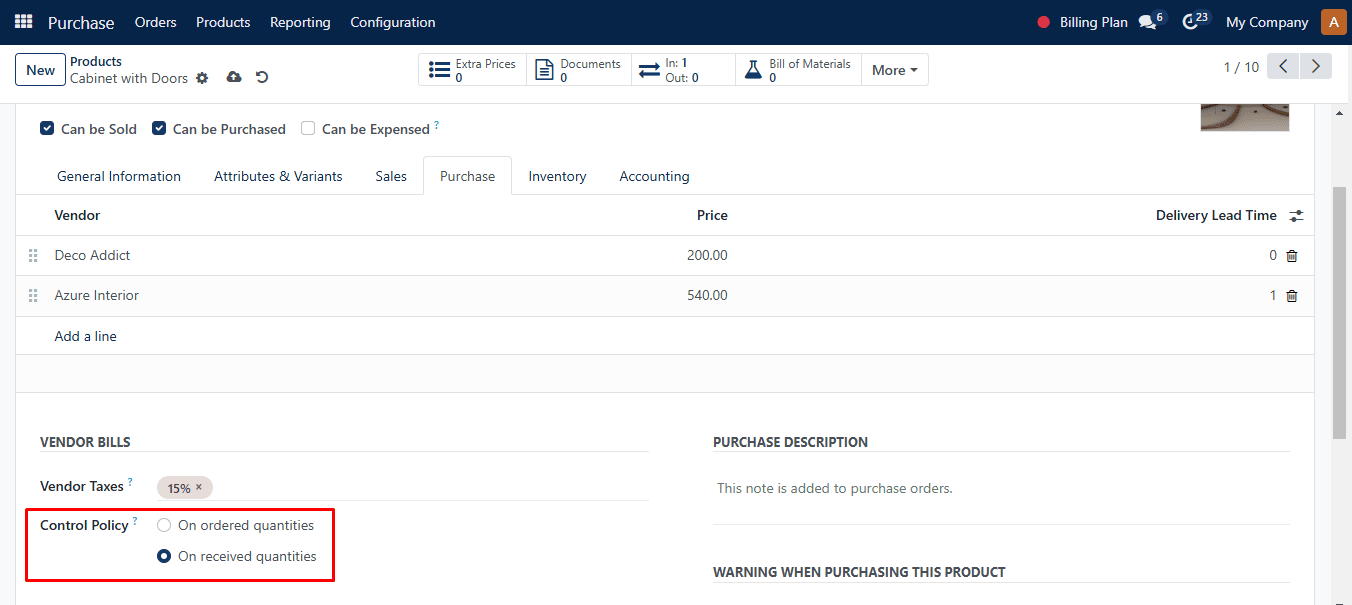
You can create vendor bills in SAS based on delivered and ordered quantities in accordance with business regulations. To set the Bill Control policies, navigate to the purchase module’s settings menu.
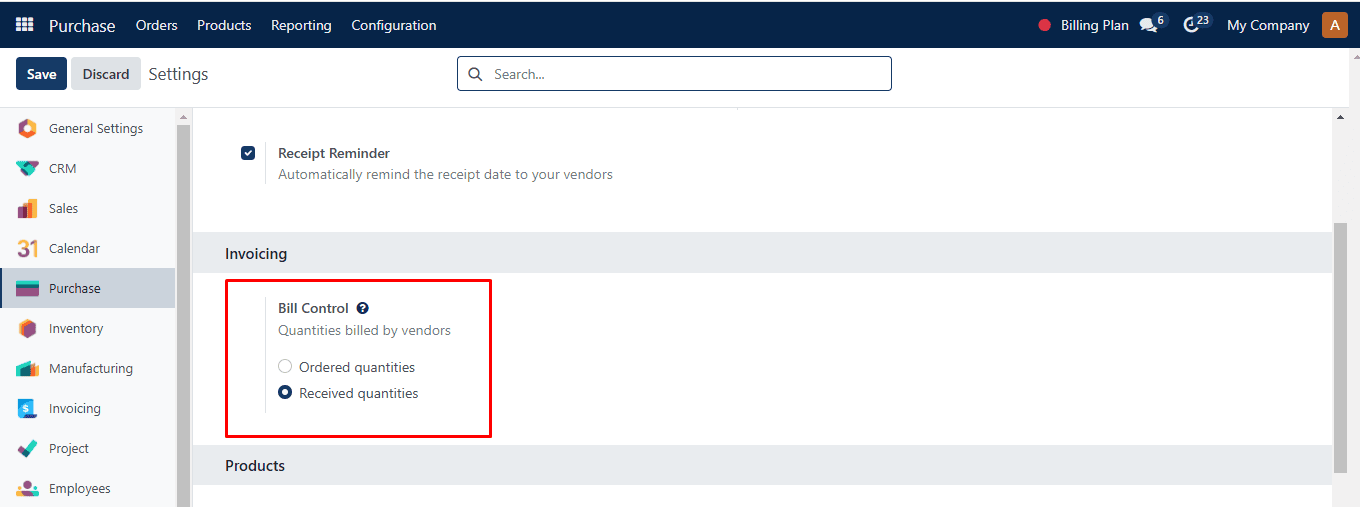
The Bill Control option can be found on the Invoicing tab. This section will assist you in specifying the method for creating purchase invoices. The default bill control policy that you select here will be applied to all items. Subsequently, you can modify a product’s invoicing policy from its form view. You can create bills both before and after delivery here. You can choose the Ordered Quantities as the Bill Control if you wish to create vendor bills for each and every order quantity. You can create bills for each quantity specified in the purchase order by choosing this option. SAS, however, will only bill for the delivered amounts in the case of the Received Quantities.
From each product’s form view, the control policy can be set. You will see the appropriate option under the Purchase tab, as seen below.
Let’s now examine the process of creating a vendor bill for a purchase order. The Create Bill option will appear when you complete the transaction.
When you click this button, a new window with the vendor bill’s draught form will open.
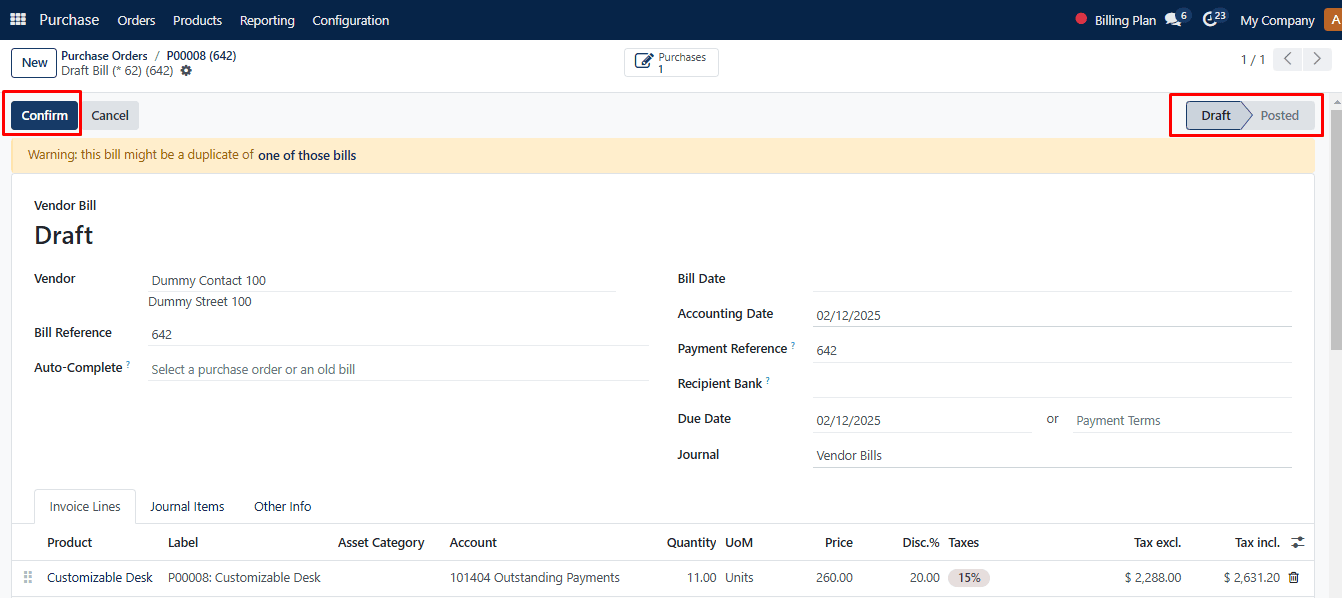
The vendor, bill reference, accounting date, payment reference, receipt bank, payment items, and journal are all included in the draft bill. In order to verify the bill, don’t forget to provide the Bill Date. The tabs for Invoice Lines, Journal Items, and Other Info will have more information. Press the Confirm button now. Payment for your vendor bill is now available.