The CRM module is made in a way that makes it simple to start a new quote in the Pipeline window at any point. Under the Sales tab, click “My Pipeline” and choose the opportunity to quote.
This is now in the Proposition stage. Every stage has a time limit. The duration of the opportunity at that specific stage is indicated by the time frame.
Next to ‘New Quotation,’ you have the Won and Lost alternatives. If the opportunity satisfies the parameters to be converted into a quote order, click “Won.”
Now, click ‘New Quotation’ to start the conversion. You’ll see a dialogue window appear.

You have three possibilities for customer data here – make a new customer, link to an already-existing customer, and don’t link to a customer. Select the necessary choice, then press “Confirm.”
The window to add the customer’s details will appear.
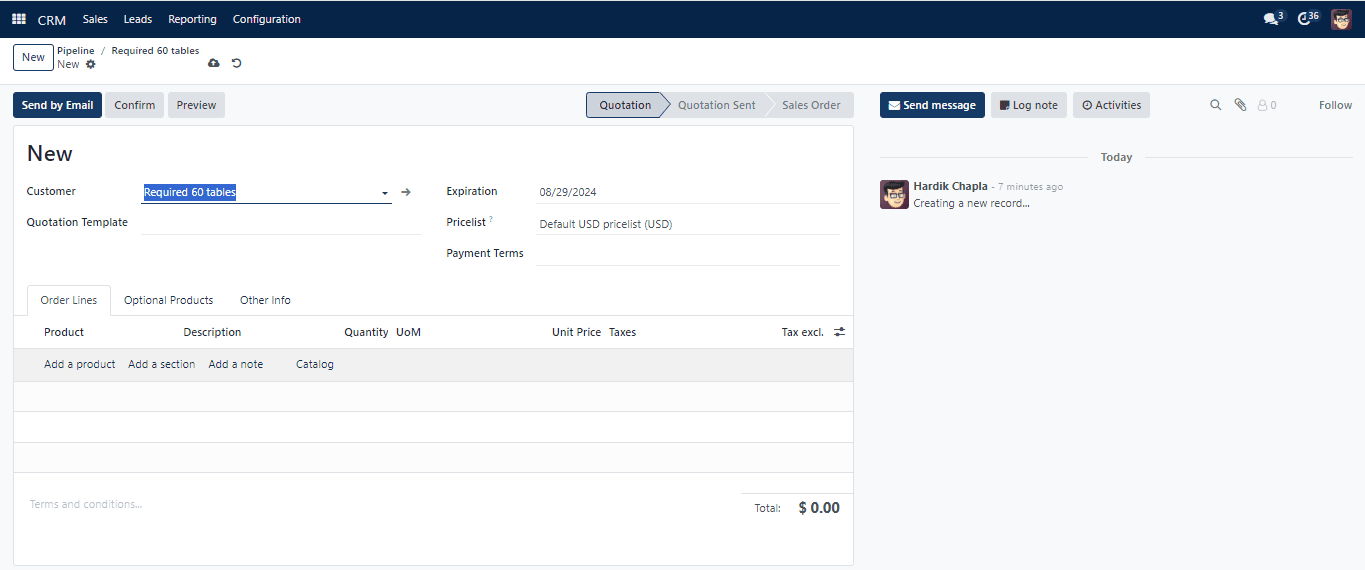
After entering the information, click ‘Confirm.’ The Quotations window displays all of the quotations. Choose ‘My Quotations’ from the drop-down menu on the Sales tab to open this window.
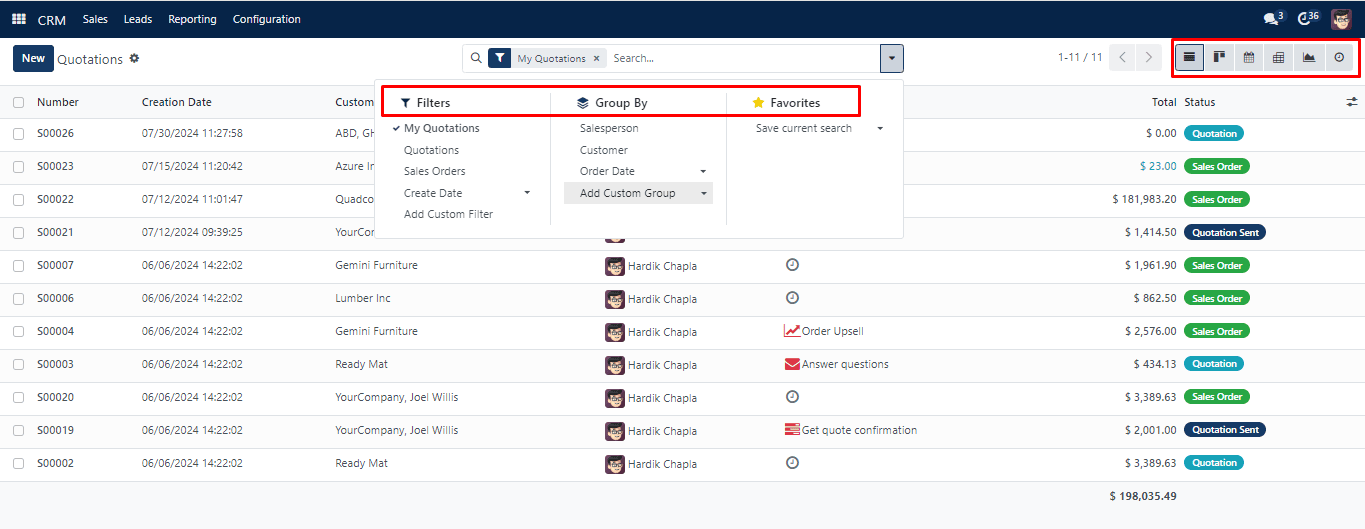
The window will show quote data such as Number, Creation Date, Customer, Salesperson, Activities, Total, and Status. Click the button in the upper right corner of the window to see further columns. As seen below, you will receive many categories.
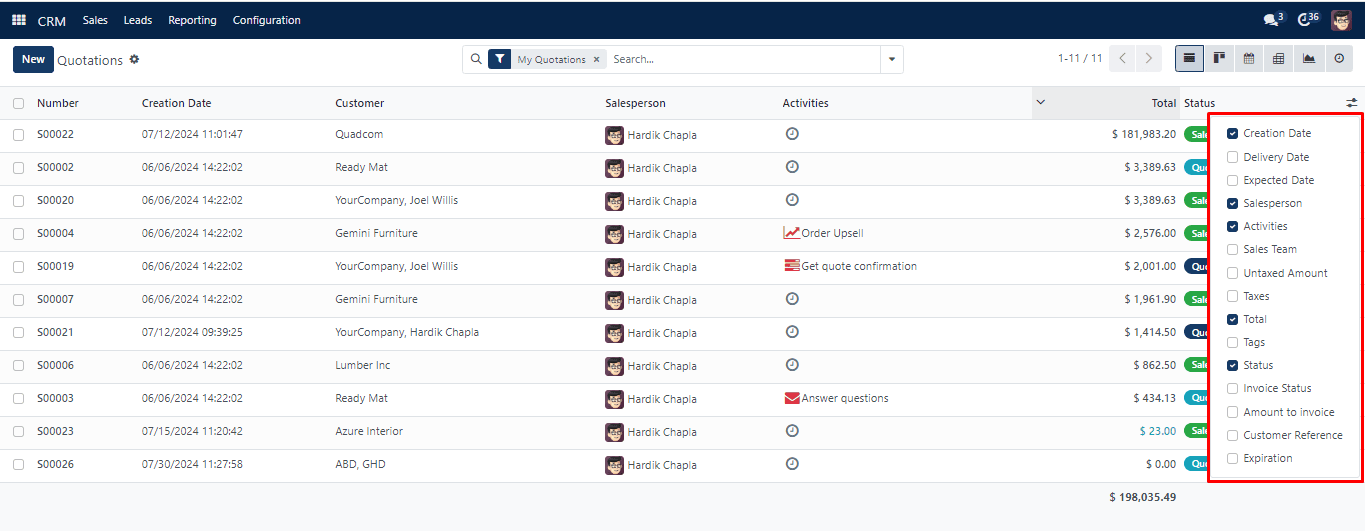
Choose the quotes that best suit your needs; they will show up in the Quotations window. By default, the window will show up in the List view. You may switch this to the Kanban, Calendar, Pivot, and Graph views for convenience.
The Filters and Group By options make it simple to find a certain record or data collection. By storing your filters, you may use “Favourites” to save the trouble of applying the same filters again. With this option, you can also specify default filters.
To organize and review various customer-related tasks, click the Activity button.

This window displays all planned tasks as well as their associated due dates. Click the plus icon in any cell or choose the cells that are already filled to utilize “Schedule an Activity” to start a new schedule. The window that follows will appear.
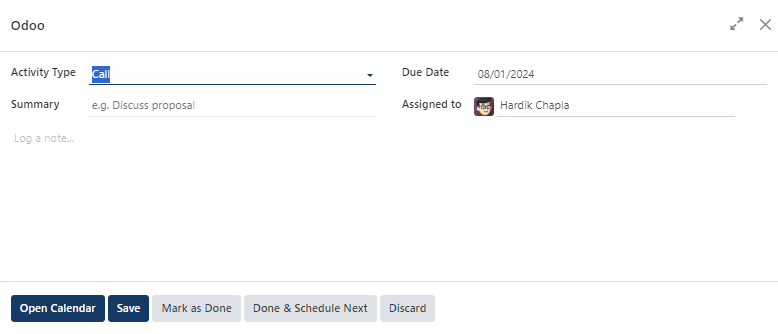
Enter the activity information and choose from the Schedule, Mark as Done, or Done and Schedule Next options.
To update a specific record, simply click on it and change its details. From the same window, you can instantly turn a quotation into a sales order. The window that appears when you click on a quotation is as follows.
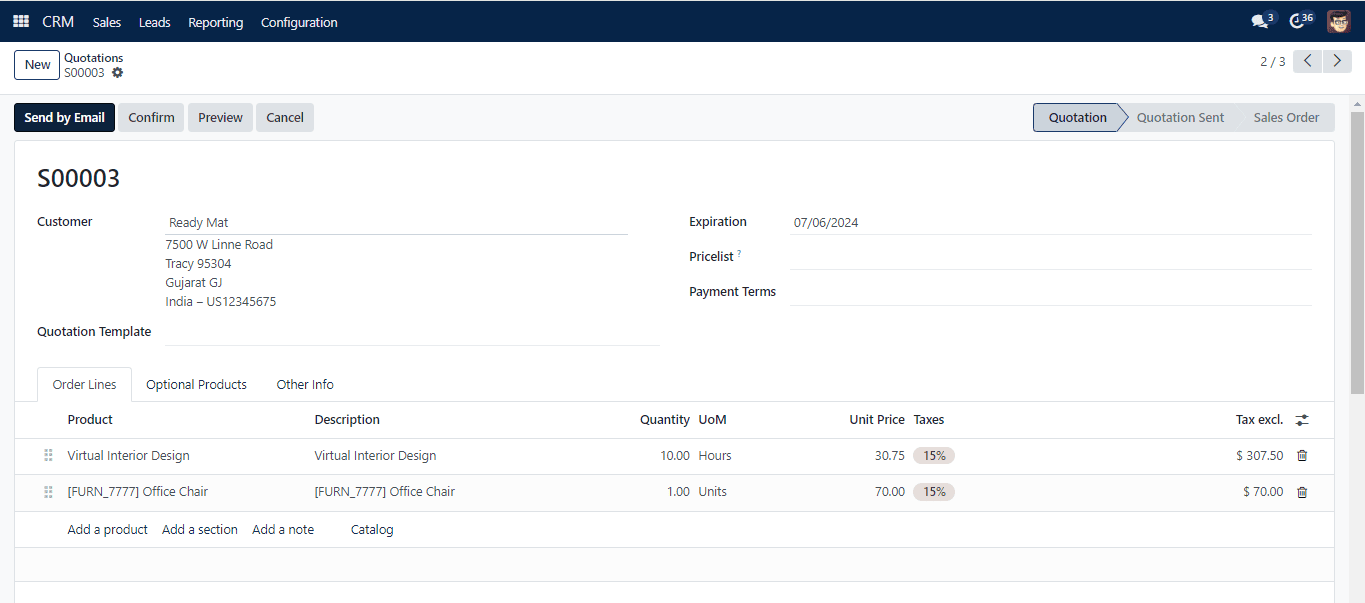
Click ‘Confirm’ to turn it into a sales order. By selecting “Send by Email,” you may email the consumer a confirmation.
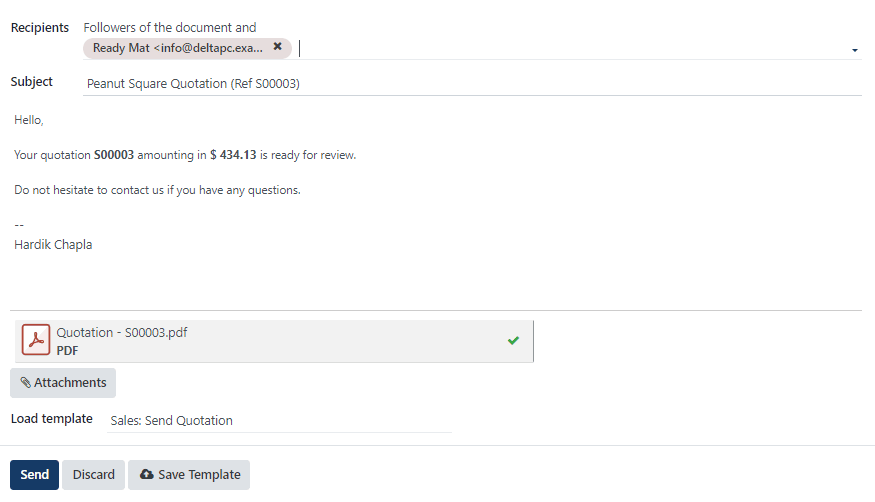
After you’ve confirmed the email content in the pop-up box, click ‘Send.’ The establishment of a new sales order is completed with this step.